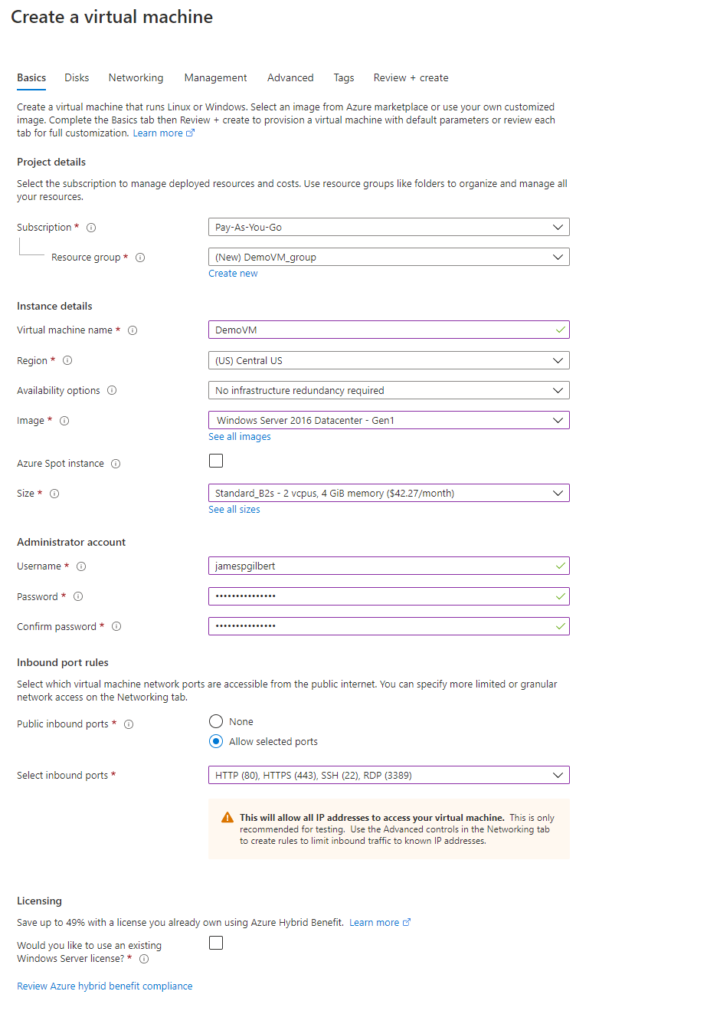
Create your Azure VM
Setting up a VM in Azure is easy…too easy. Probably the trickiest part is finding the most cost-saving options, which are few. I always start with the most shameful offering and upgrade only as desperation demands.
But I found that, try as I might, I couldn’t get away with the basement B1s offering. It simply lacked the memory resources to setup. However, you can always start with B2s and downgrade when the settings are locked in. The main challenge is memory and apps such as IIS are demanding to run.
However, the monthly fee of B2s is currently $42, which is high. You pay hourly for the VM to be on. So if you turn it off, it saves you money. Most servers are always available so that’s not an option beyond development.
The full settings I pick below are as follows:
- Windows 2016 Datacenter Gen 1 (Don’t worry it’s just a rebranded Windows Server 2016)
- Standard_B2s
- Inbound ports HTTP (80), HTTPS (443), SSH(22), and of course RDP (3389) which we need to access the VM!
Your newly created VM will deploy and create plenty of Azure notifications in the process.
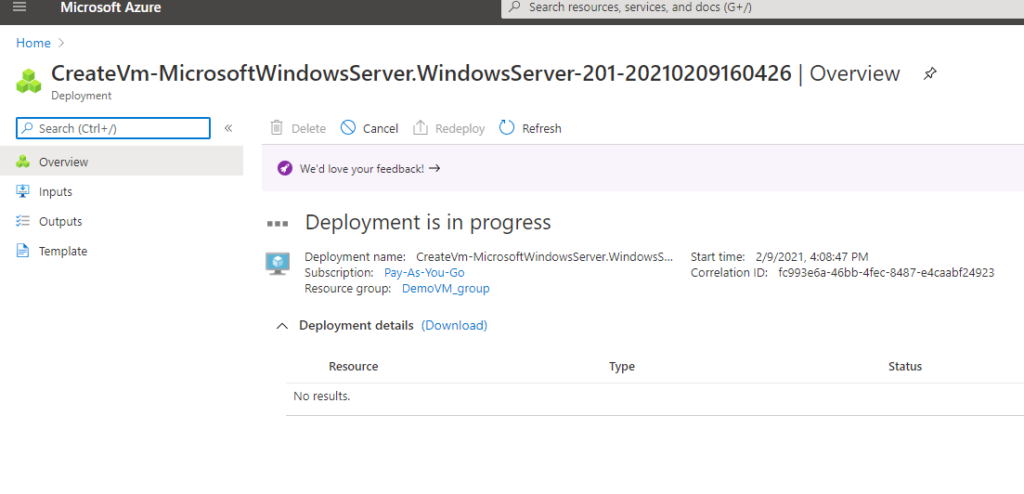
When deployment is complete, go to the resource.
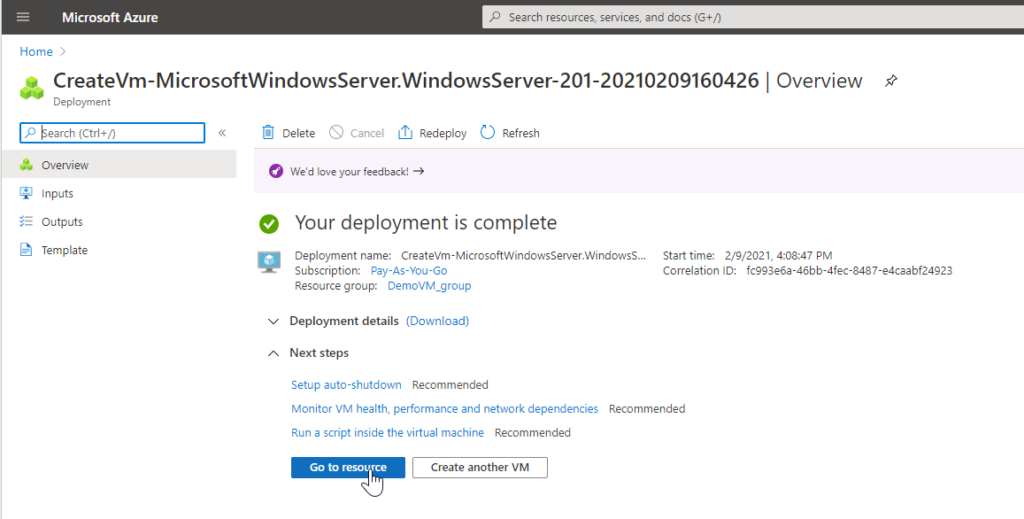
On the resource’s overview page, you can see your VM’s IP (highlighted yellow below). Copy it and otherwise make note of it since we will need it later.
Via the connect menu option, download an RDP connection file which will connect you to the VM with Windows’ Remote Desktop client.

RDP into your VM
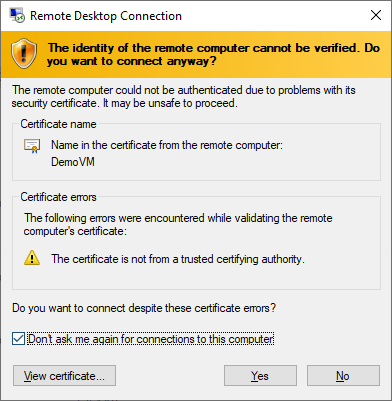
Open the RDP file and you will be prompted for credentials. Make sure you are using the option which gives you both the user and password fields (in case you are on a network and the computer assumes your domain or user).
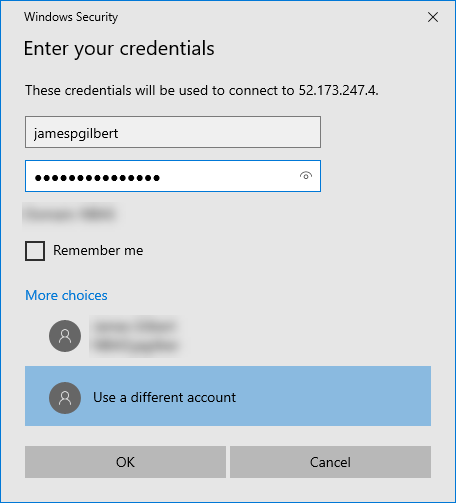
Say okay to all the risky messages about accessing this shadowy entity you created.
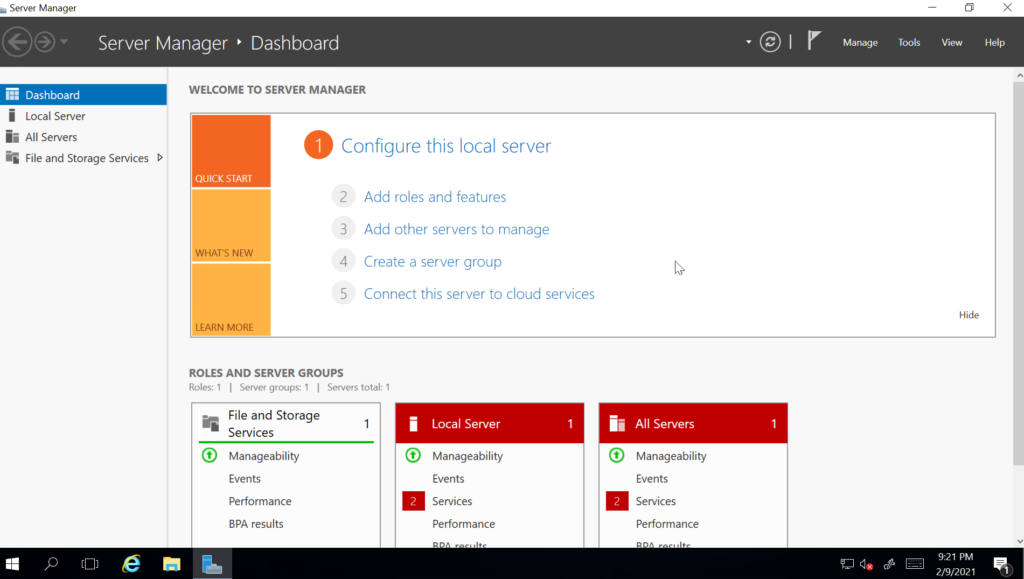
Once connected to your VM and logged into Windows, Server Manager will start.
Setup IIS
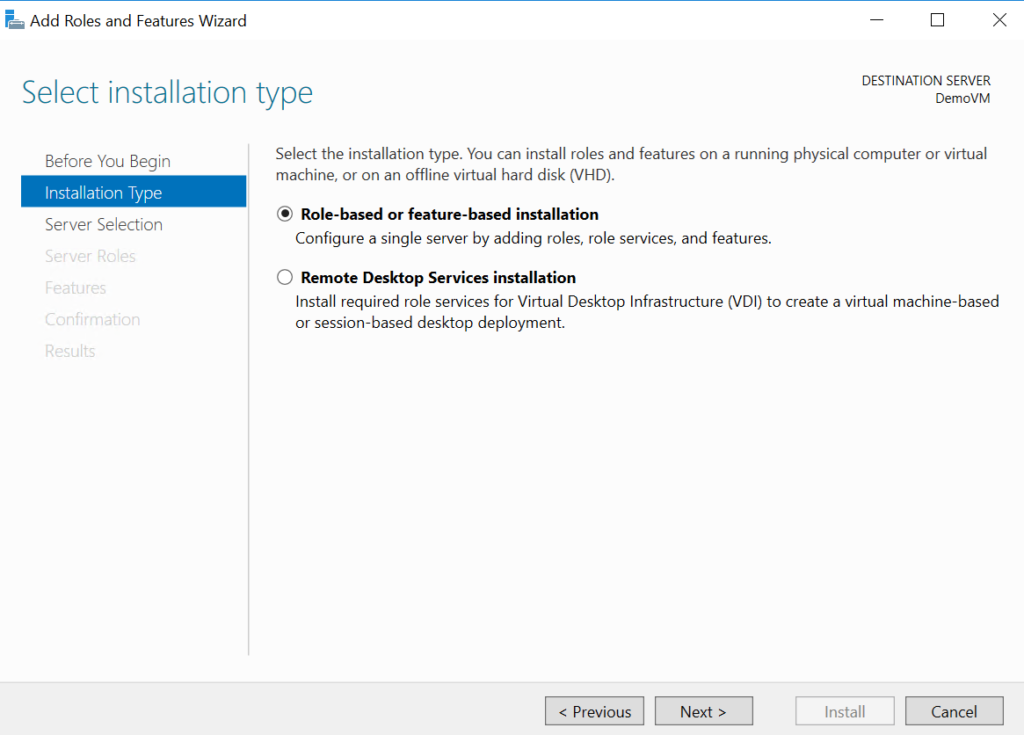
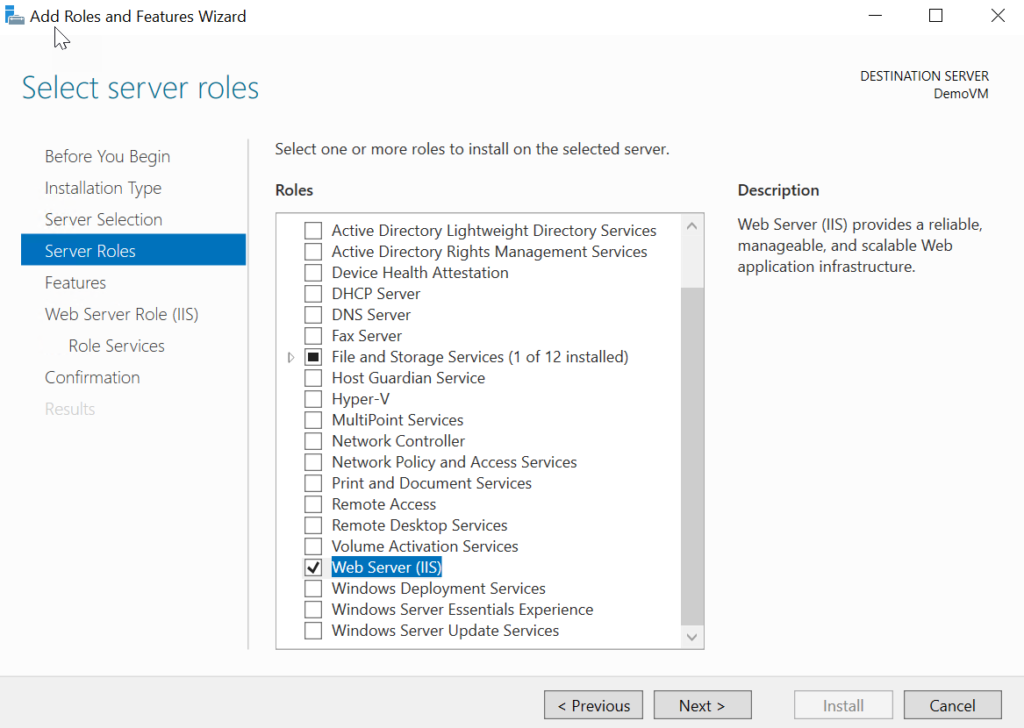
The first thing you will need to do is add IIS. To do so, you can click the Add roles and features via that numbered menu or via the Manage menu.
In the wizard, choose Role-based or feature-based installation.
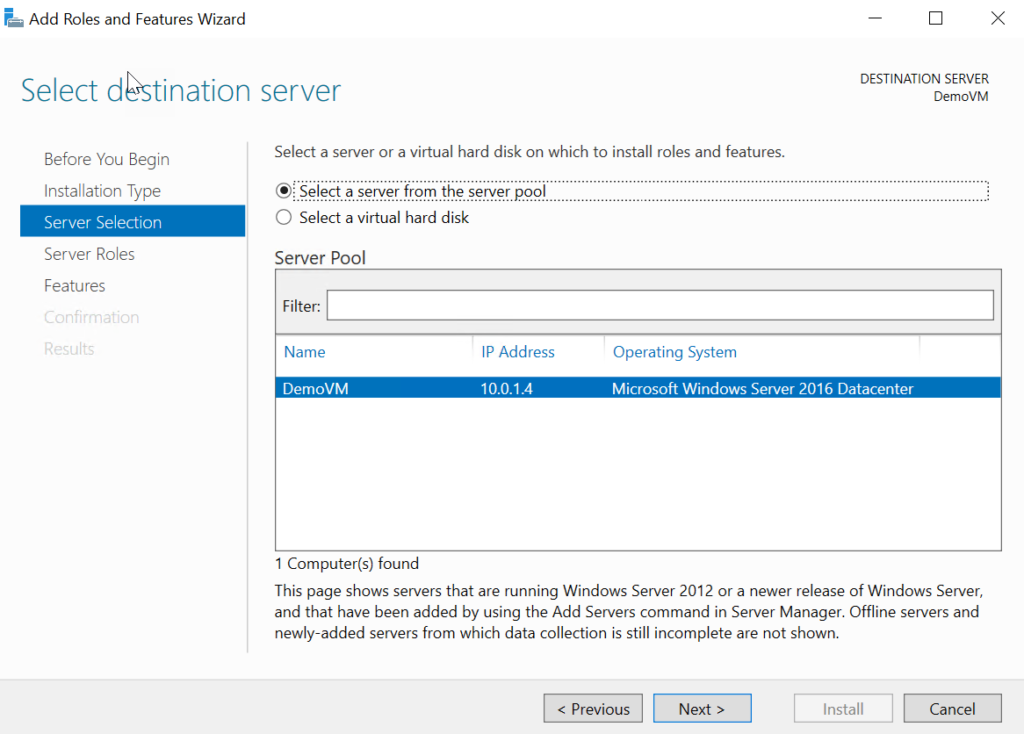
Select your server (it should be the only item).
In the following list, simply select the IIS option, which you will need to access.
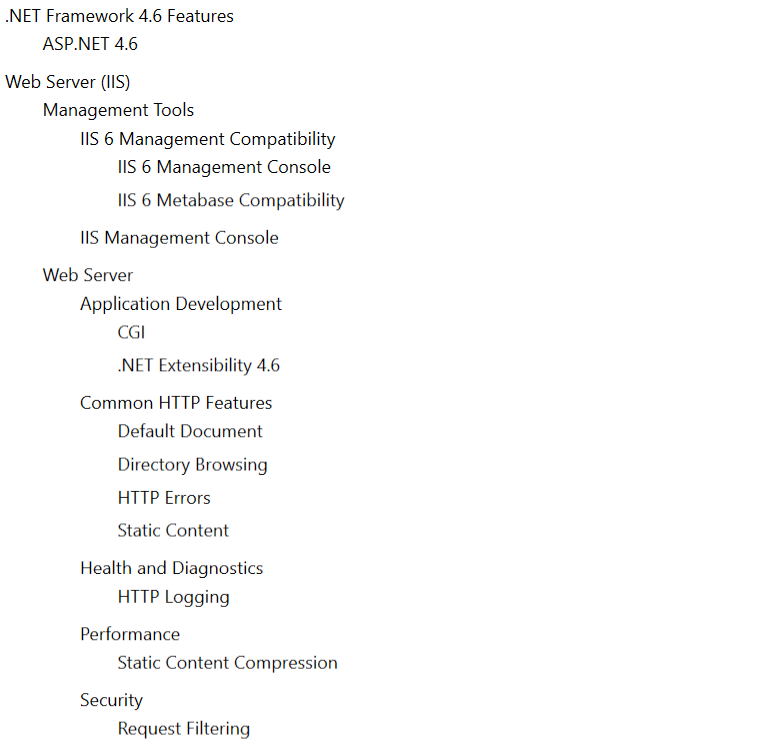
I recommend the following options
- .NET Extensibility 4.6 (requires ASP.NET 4.6)
- CGI (used by PHP which also requires .NET 4.6)
- IIS 6 Management Console and IIS 6 Metabase Compatibility (for SMTP support)
Configuring IIS
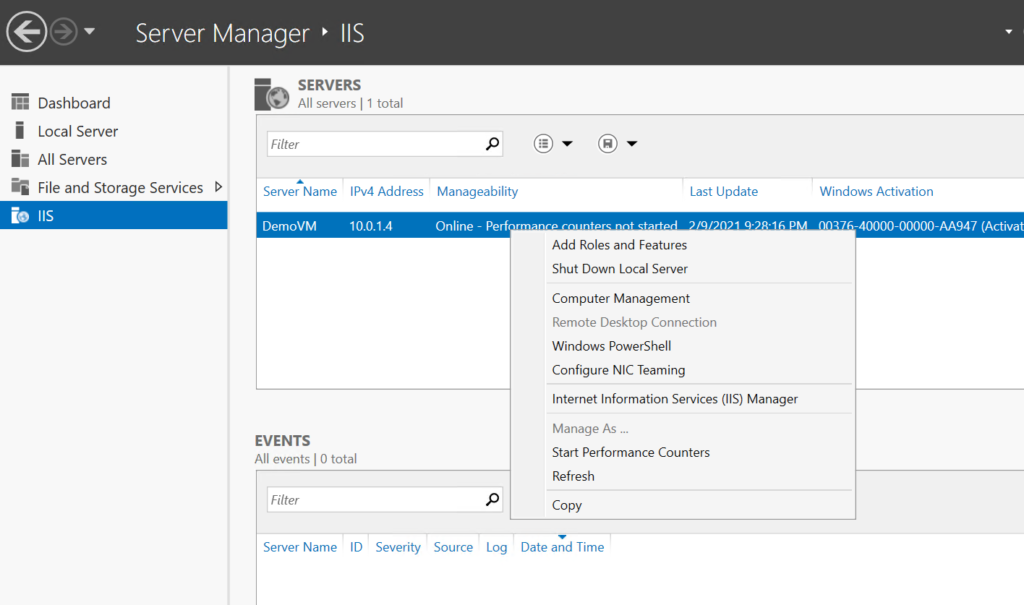
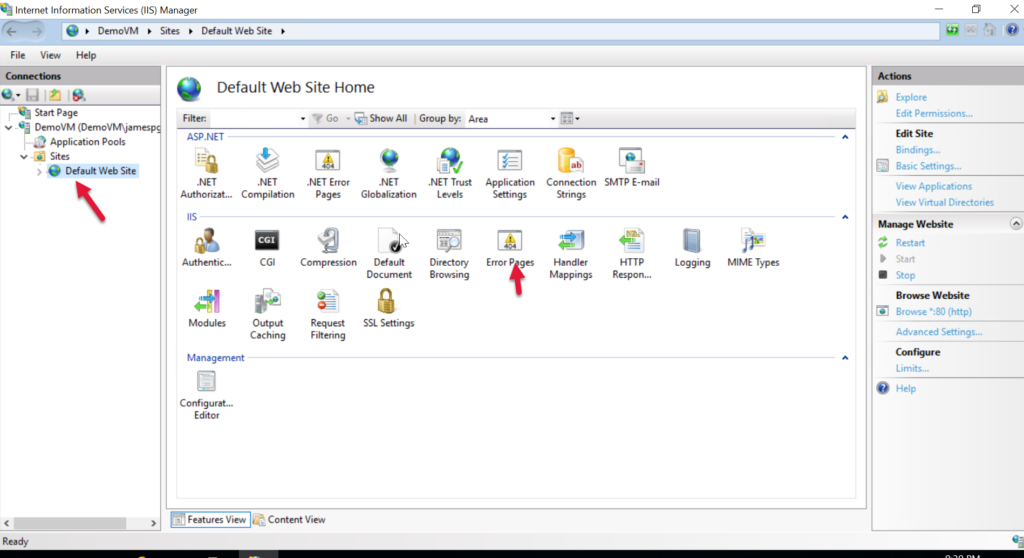
After the install you will see IIS in the sidebar options.
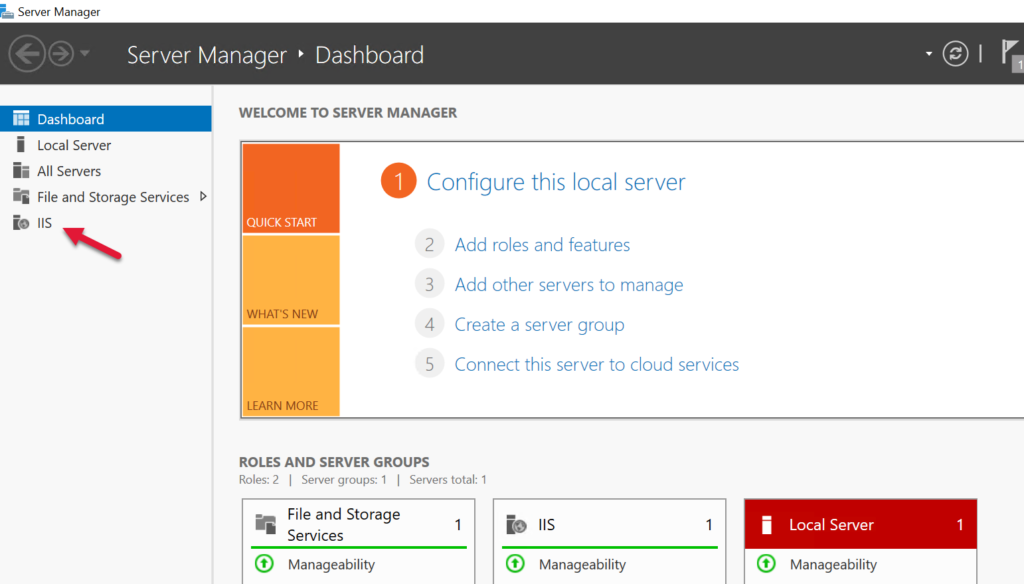
Select IIS in the sidebar and right click on your server to get the context menu, and select from it Internet Information Services (IIS) Management.
We may want to have more verbose error messages to help us debug the issues related to getting the server running. We can do that via the Error Pages option which appears when the Default website is selected.
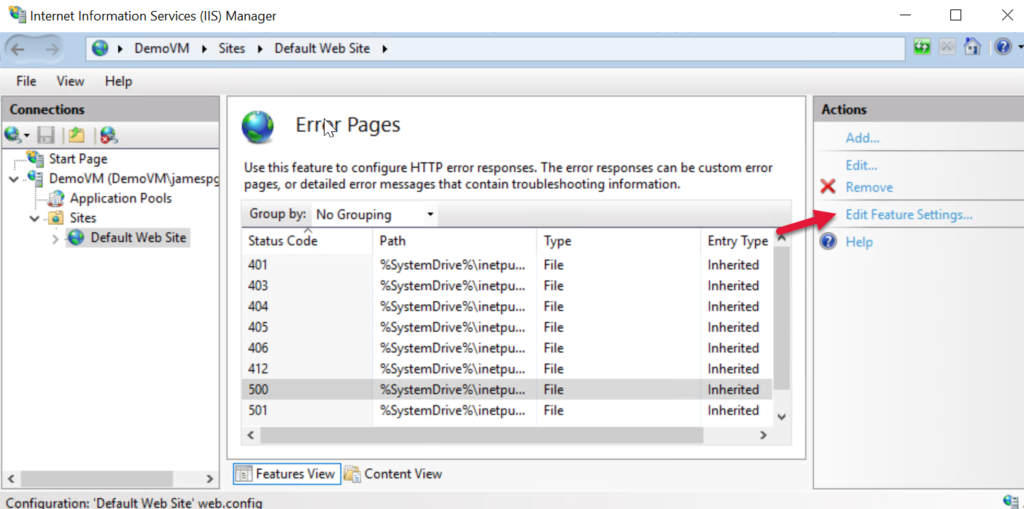
Select the 500 (server) error and choose Edit Feature Settings…
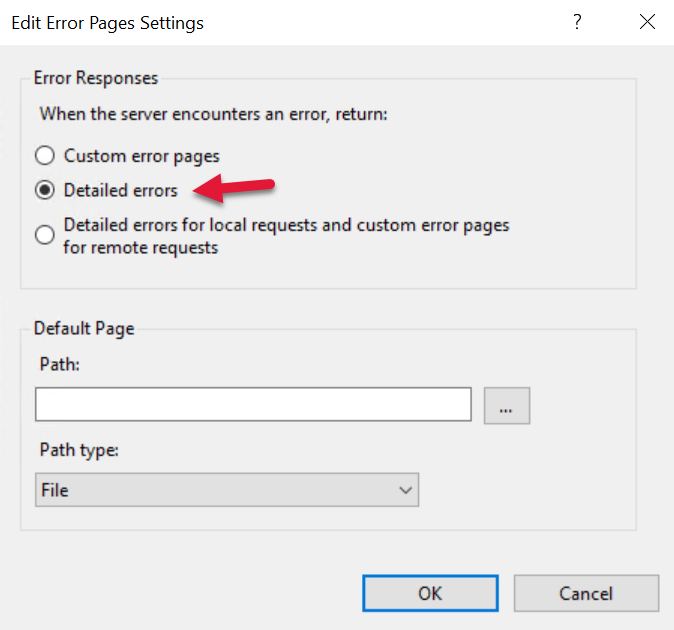
Turn on Detailed errors, because we want to see why something fails when we try to access this VM remotely. You can turn this off when everything is running okay.
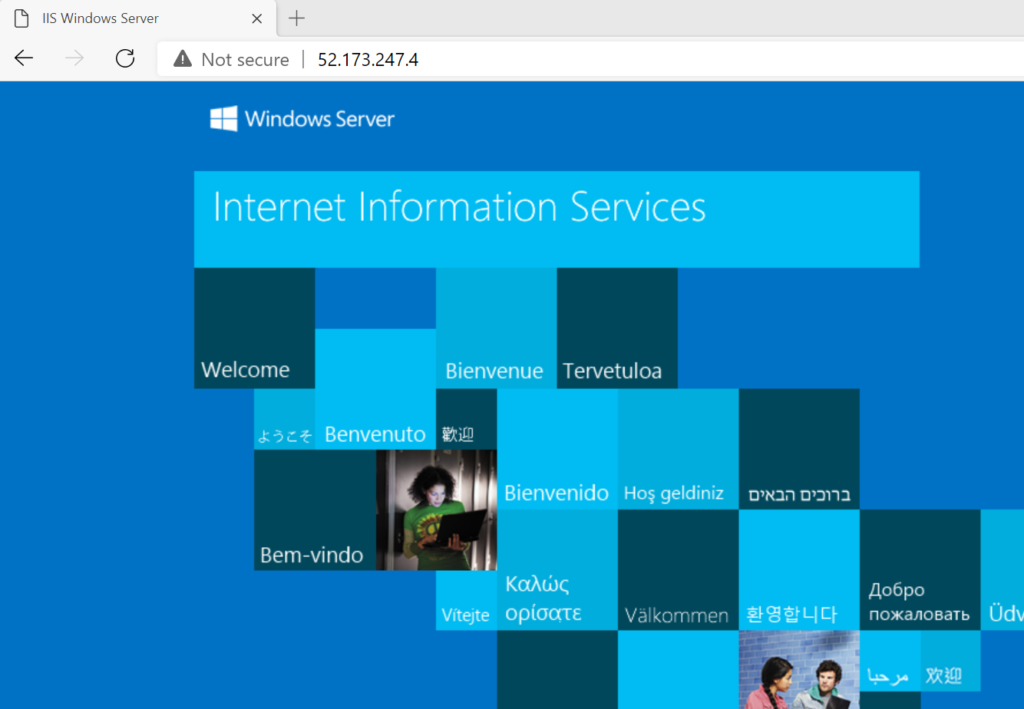
Test remote access to the VM
Enter http:// followed by your IP address. You should see the default IIS splash page in drab shades of blue and speaking in tongues:
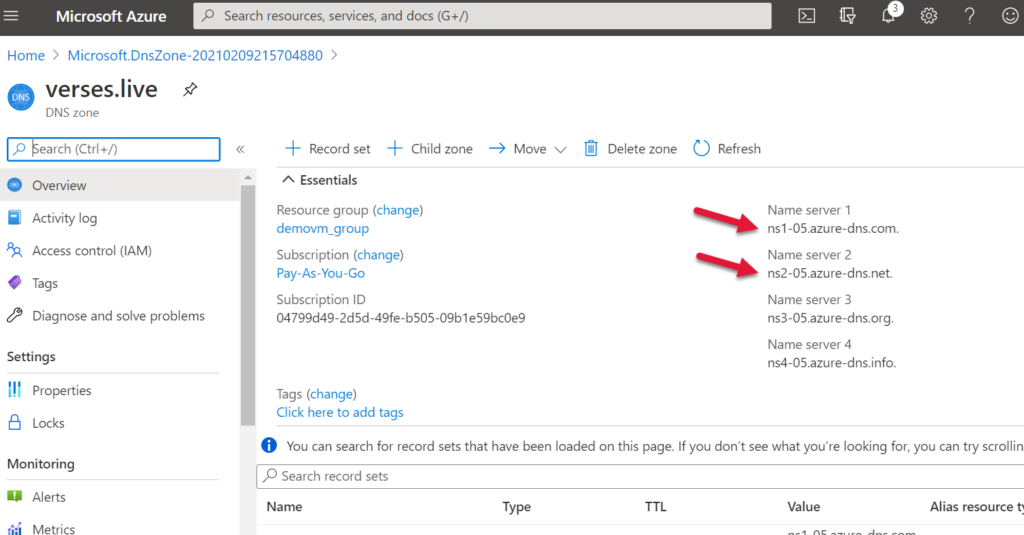
Setup Azure DNS
Now you will need to setup Azure DNS for your VM. To do this, you will need to pay Azure at least $1 more per month (at the time of this writing) by way of a DNS Zone (trampoline and ball pit access not included).
Create a DNS Zone for your domain and put it in your VM’s resource group
Once the DNS Zone is deployed, go to the resource. You’re going to need the top two name servers listed for configuration with GoDaddy:
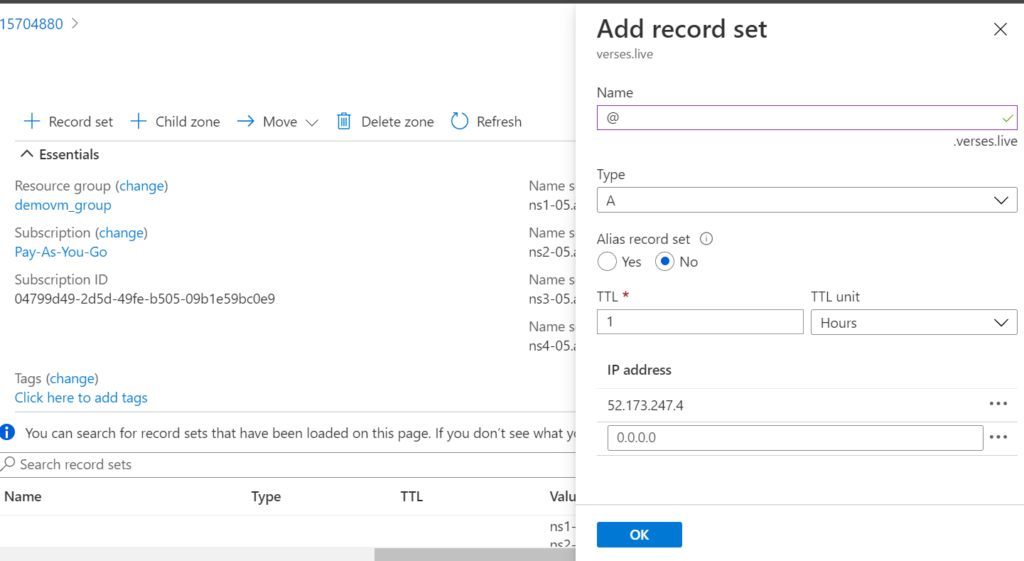
You need to also add a record to this DNS Zone to map it to the VM’s IP Address. You’re create a new A type record for the @ name and fill in the VM’s IP in the address field.
Okay, A$ure is all set…for now.
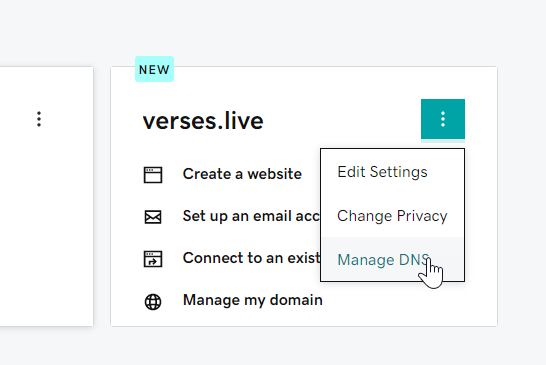
Link your GoDaddy domain to your VM
Speaking of seedy, money-grubbing establishments, GoDaddy has your domain ready to be linked. You need to setup it’s DNS settings and download the SSL certificate.
In the domain’s ellipses menu, choose Manage DNS.
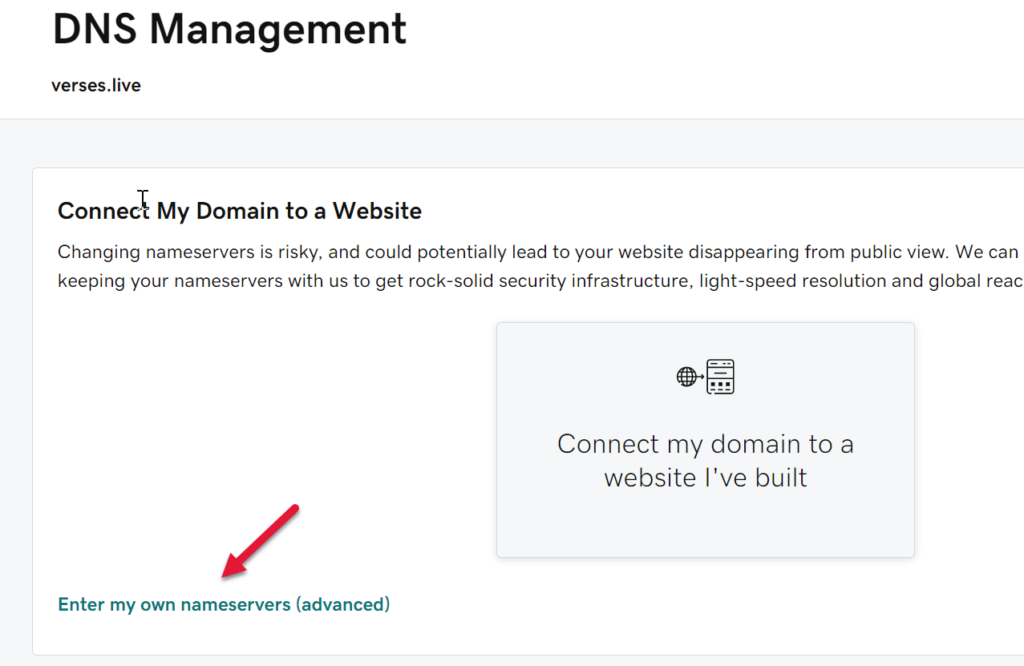
Scroll down past several intrusive product offers to find the Nameservers section and click Change.
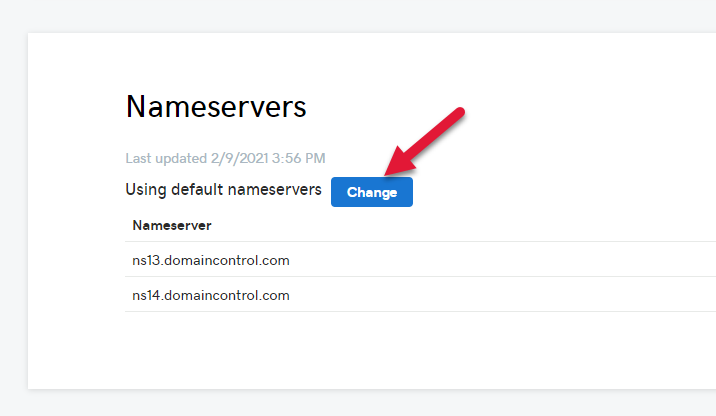
All you need to do here is set the name servers to the one’s you copied from A$ure in the prior step above.
Find the “Enter my own nameservers (ADVANCED MODE, BEWARE!!!)” link under more product promo links and click on it.
In the next risky screen we must point out that truly, the Internet is rife with peril!
So enter the Azure DNS settings you copied (without the periods at the end of them). At the time of writing this, Azure helplessly includes periods after the name server text so be sure to remove that when you paste it in the following fields, which are RISKY.
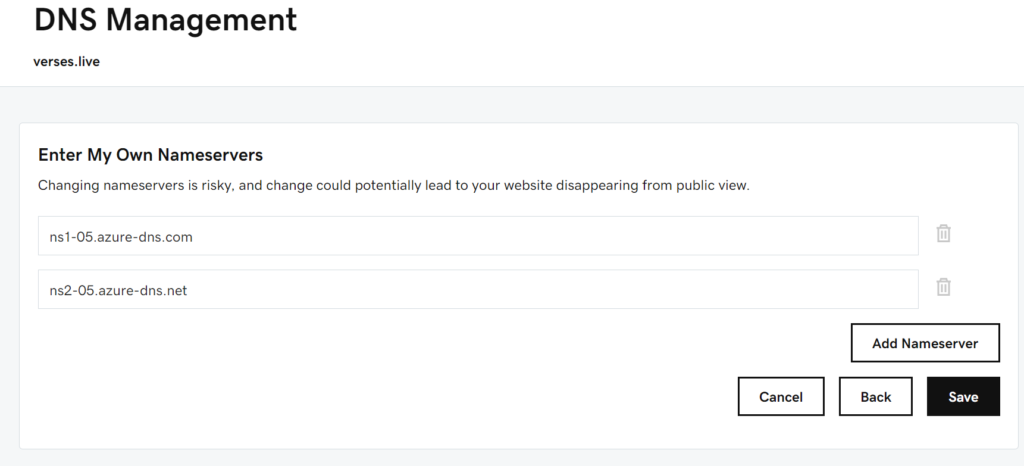
When these changes are saved, the , all the CNAME stuff will go away because GoDaddy doesn’t manage that stuff anymore, Azure doe$.
Name server changes can take some time to propagate. While you wait, maybe spend some time seeing what charges Azure has been applying your credit card. Azure’s budgeting UI is quite intuitive.
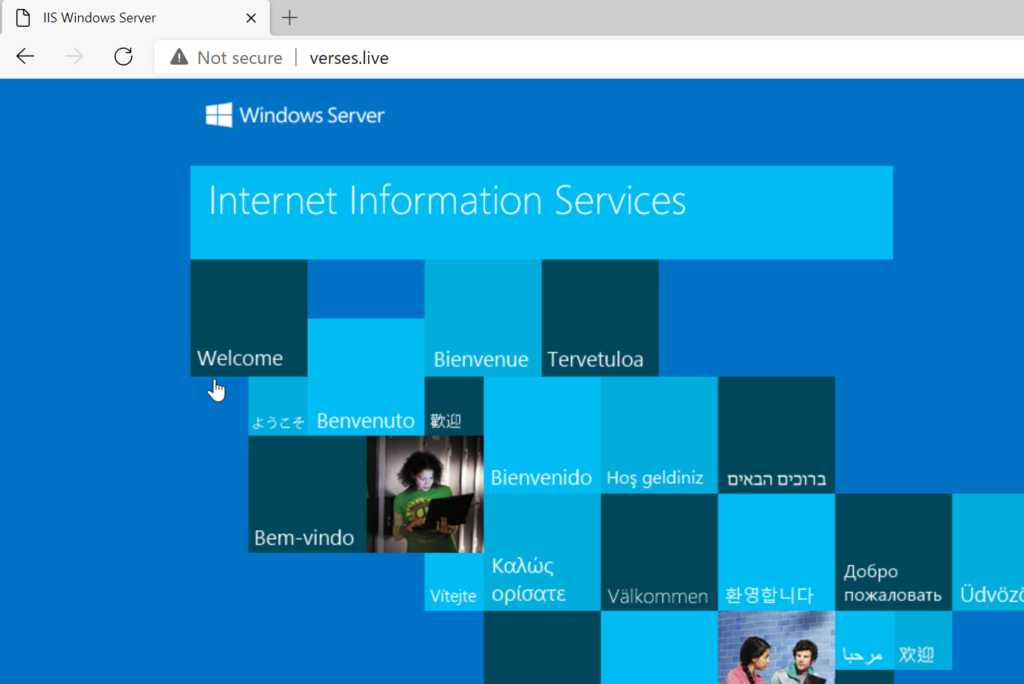
Testing remote access to your domain
Once you’ve finished tabulating your soaring Internet fees, you can check in on your namespace propagation. Enter http:// followed by your domain name and you should see the blue-cubical worldview of the IIS default website:
I got the Blues, ohh let me tell you I have the Blues
I’m a guy you can’t excuse, ohh let me tell you I have the Blues
– Sam Myers