Devloping and distributing an Alexa Skill (Part 2)

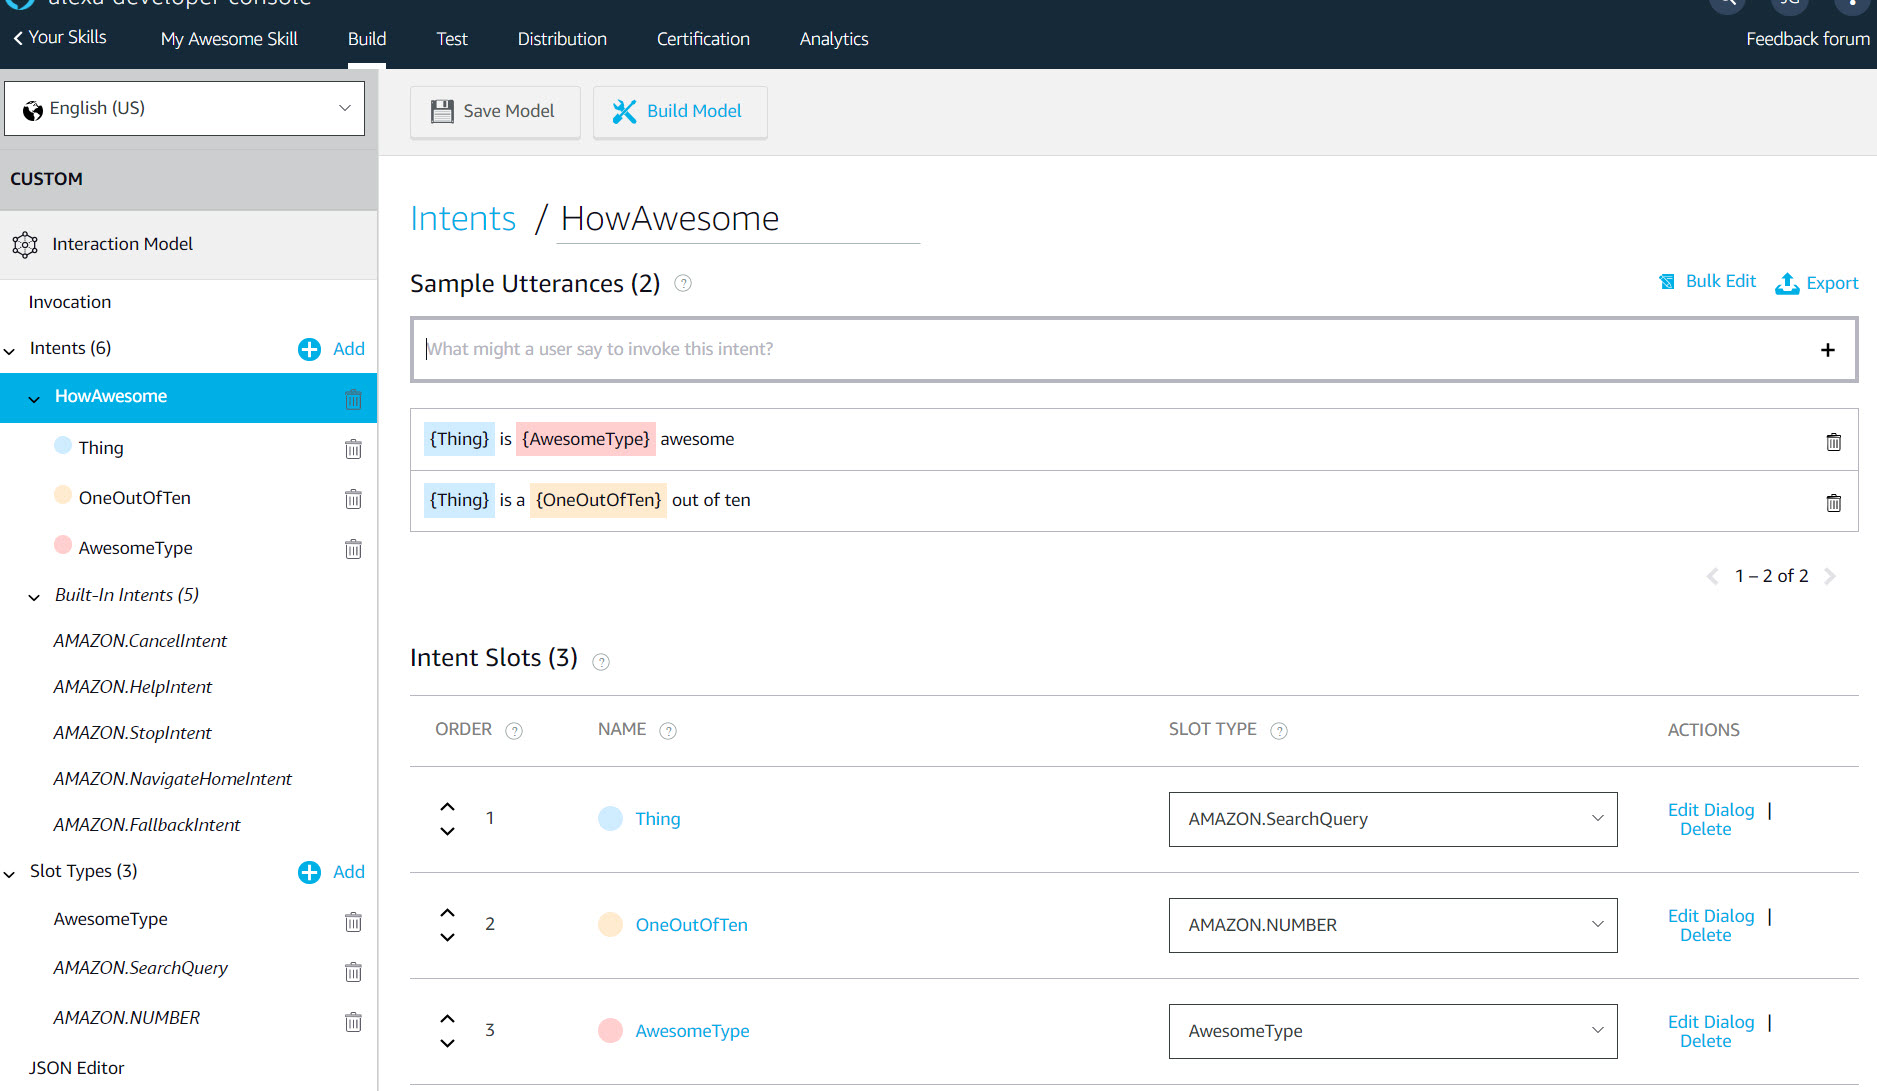
This guide continues from Part 1 where we review how to set up the app.

Now we’re ready to code the Lambda function that will actually perform the Skill’s dialogue with a user.

The Lamda Function code editor is pretty decent. With it, you can add and edit files easily, and they will store to the server side.

I like to use Vivaldi browser, but with it, I was seeing this error message a lot:

“Failed to write ‘index.js’. Please try again.”

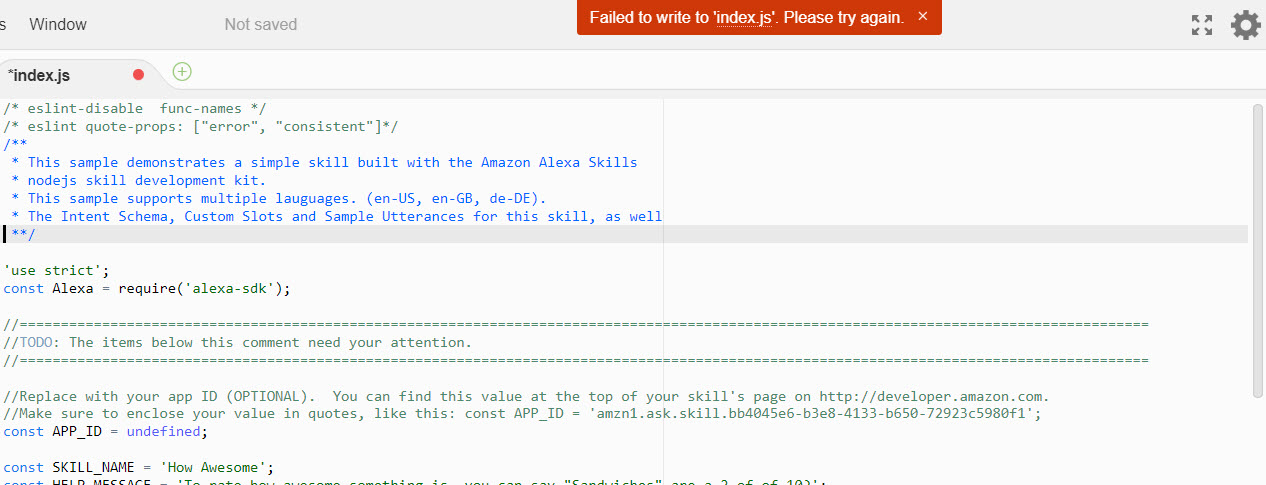
When I switched to Firefox, I was not seeing this. I have also seen others report this issue online. One thing I can tell you is that I currently have very little space on my hard drive, and I think that could be a factor, because when I first started developing using Vivaldi, it was not an issue.

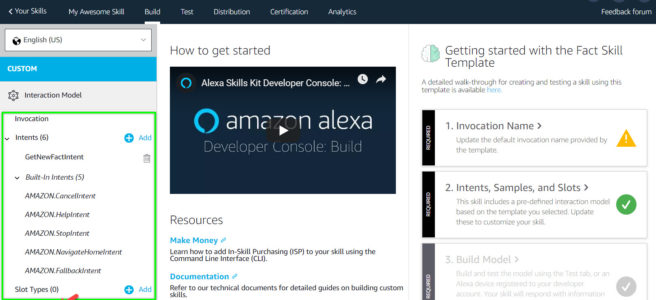
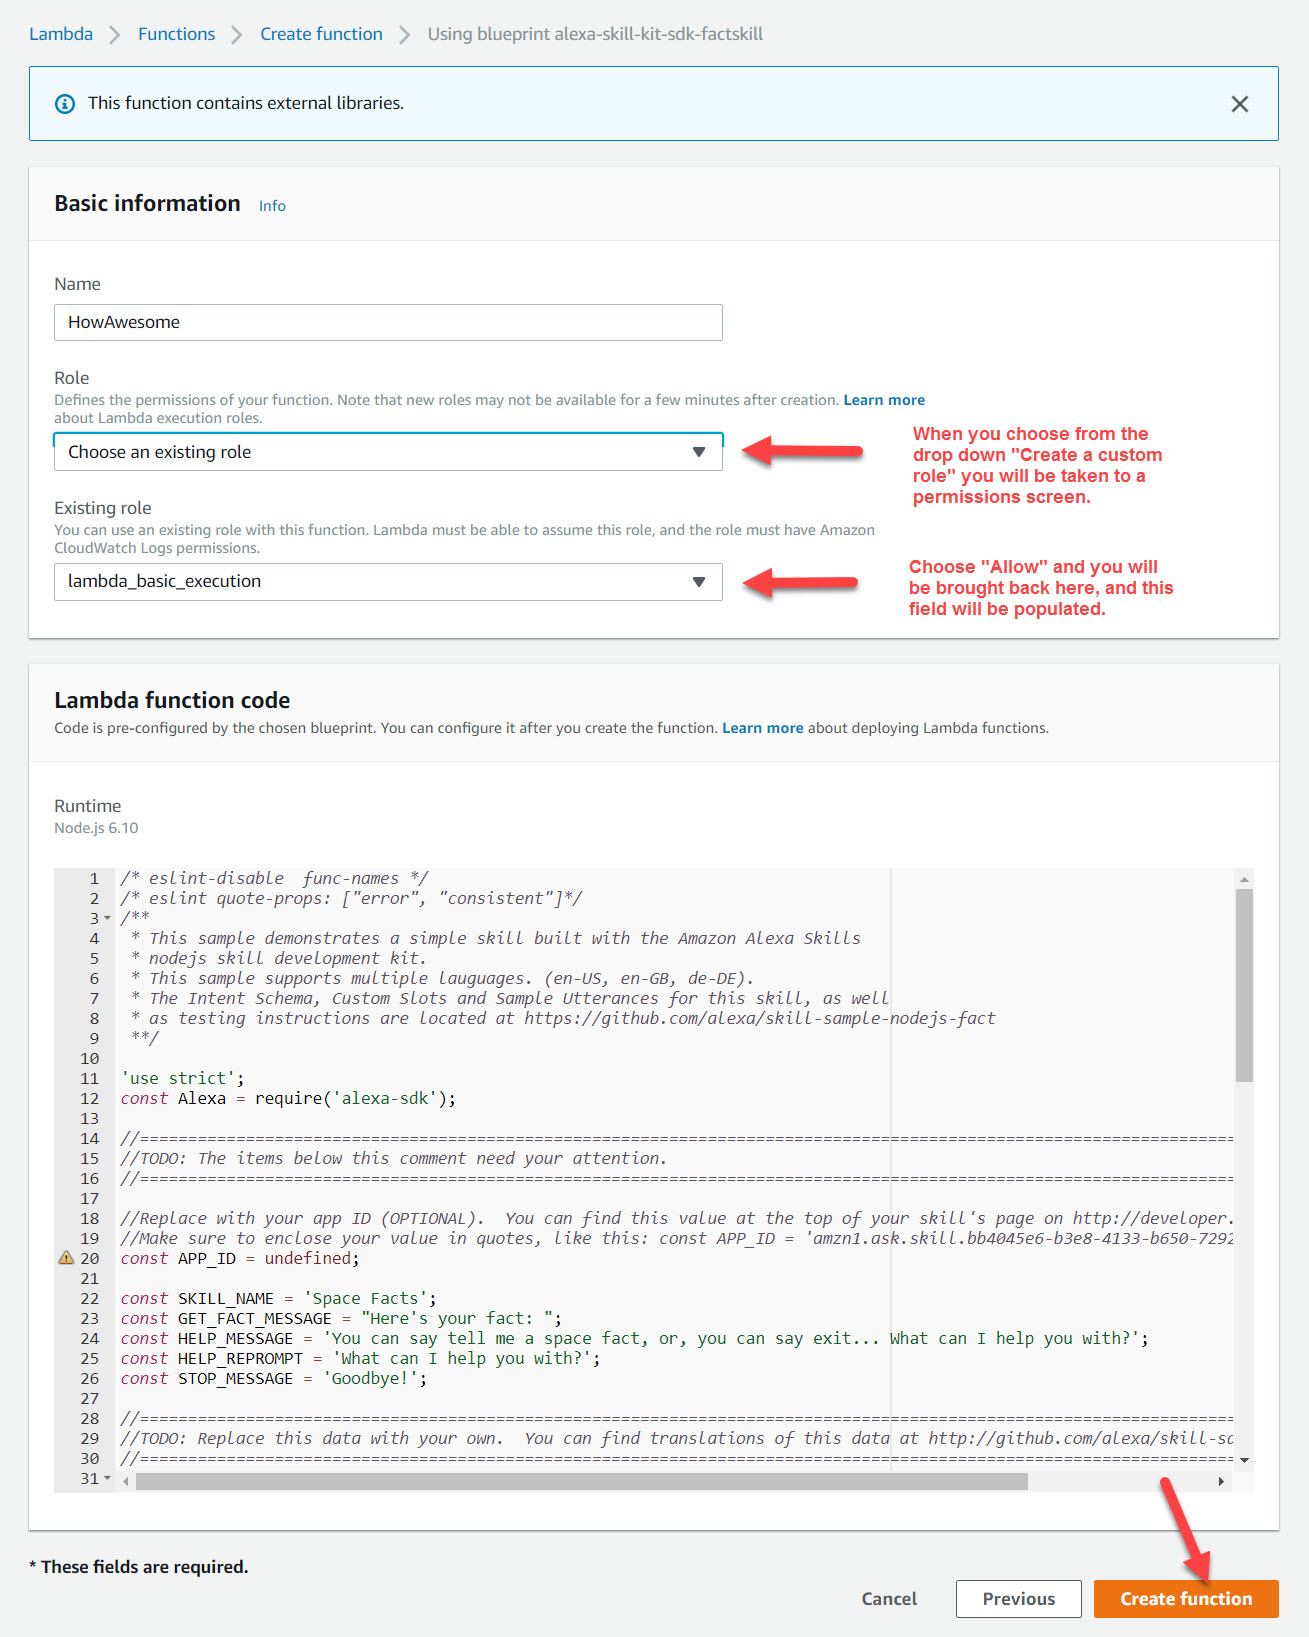
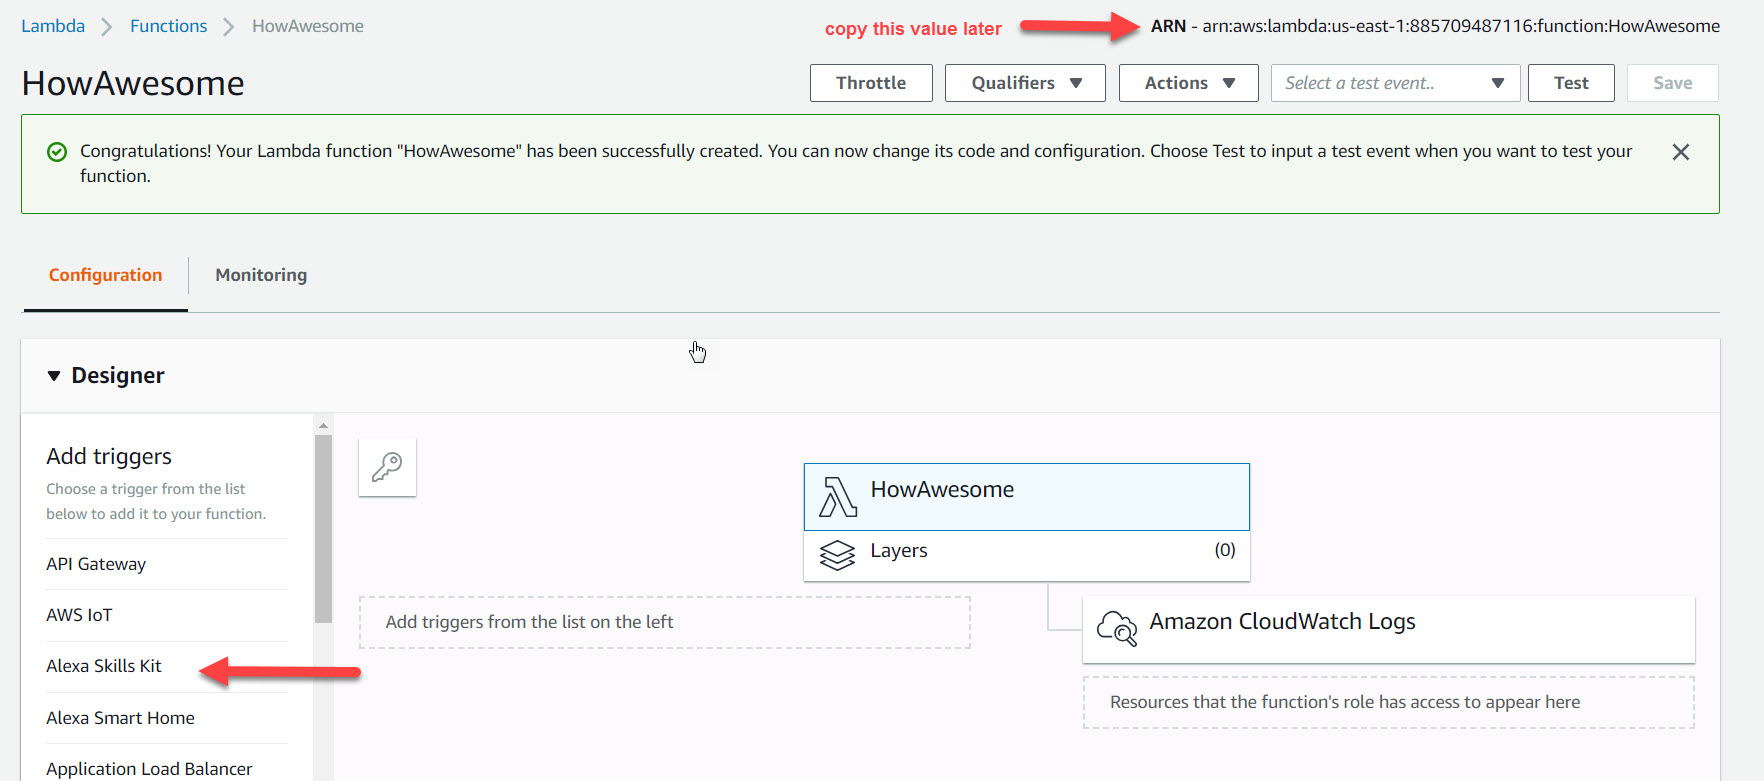
Anyways, to access your code, you need to click on the the Lambda Function name in the designer view:

Click on the function name in the designer to reveal the code in the code editor (below the designer)

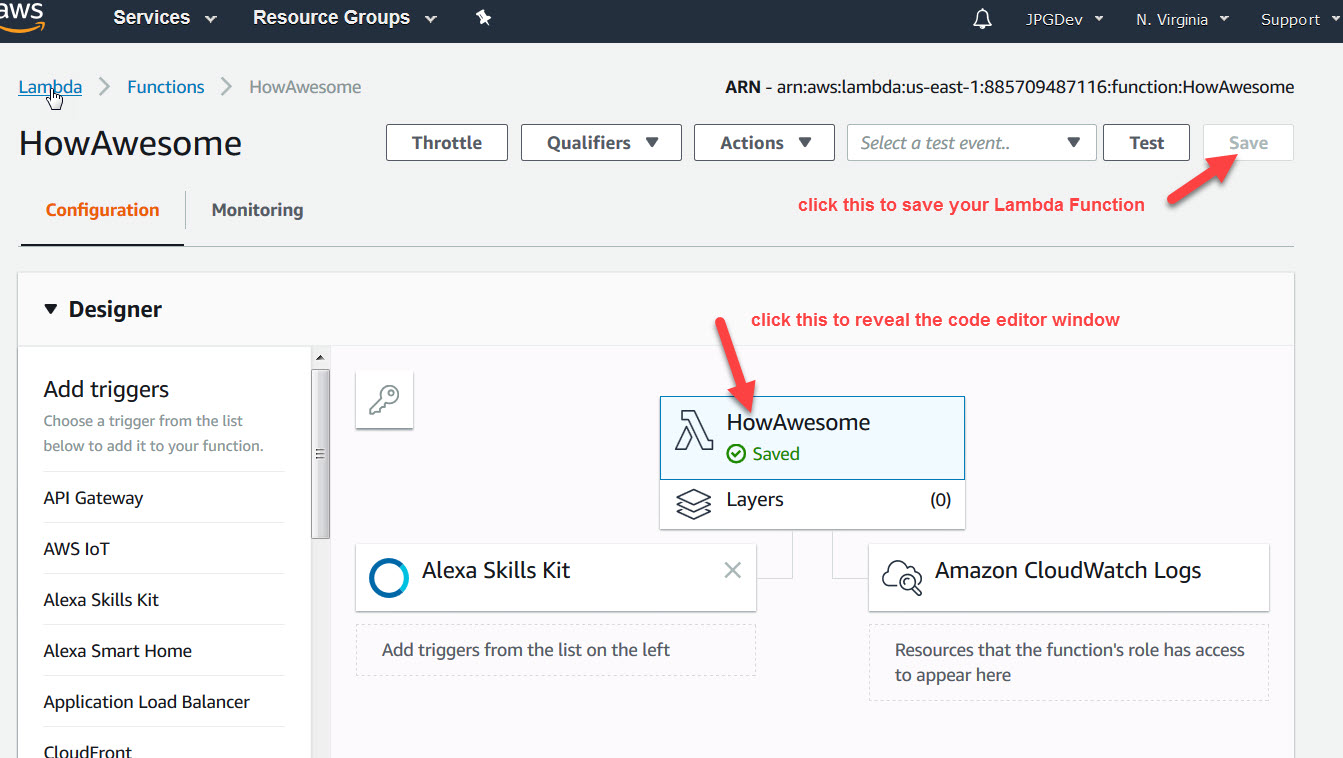
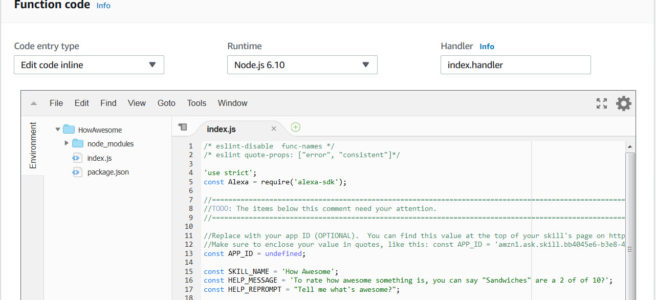
Then scroll down and see the code:

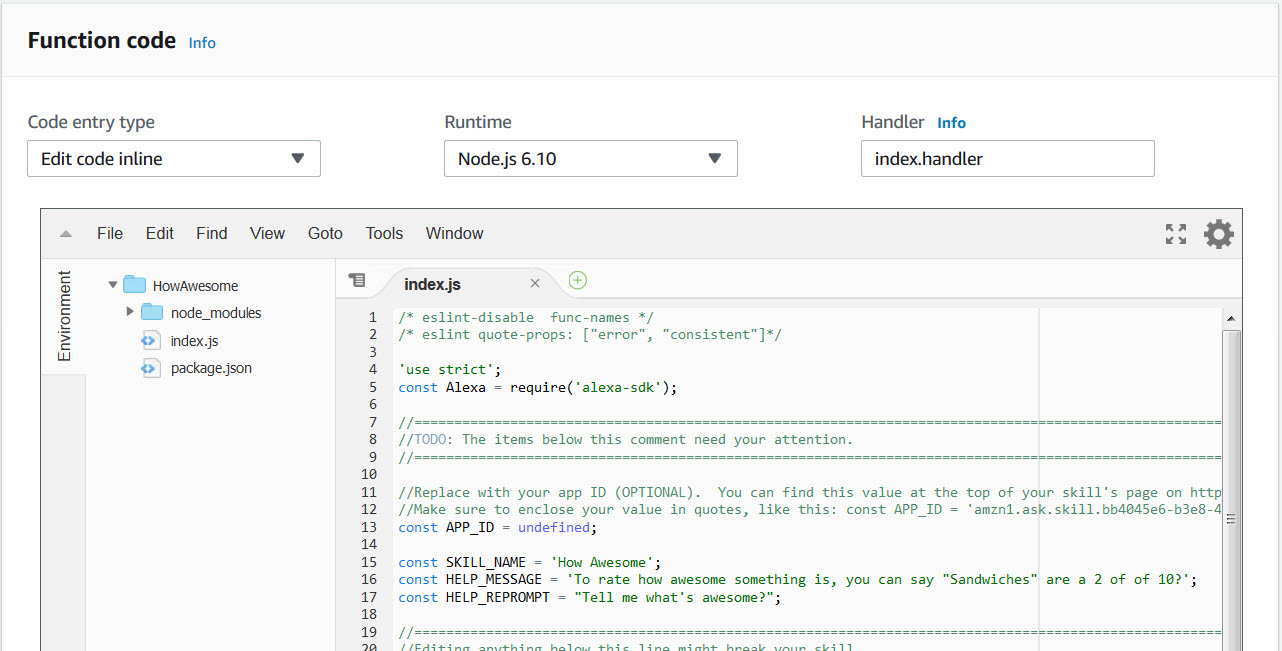
Let’s make some changes to the code above, and then we’ll test it. I have edited it to look like the following:

/* eslint-disable  func-names / / eslint quote-props: ["error", "consistent"]*/
'use strict';
const Alexa = require('alexa-sdk');
//=========================================================================================================================================
//TODO: The items below this comment need your attention.
//=========================================================================================================================================
//Replace with your app ID (OPTIONAL). You can find this value at the top of your skill's page on http://developer.amazon.com.
const APP_ID = undefined;
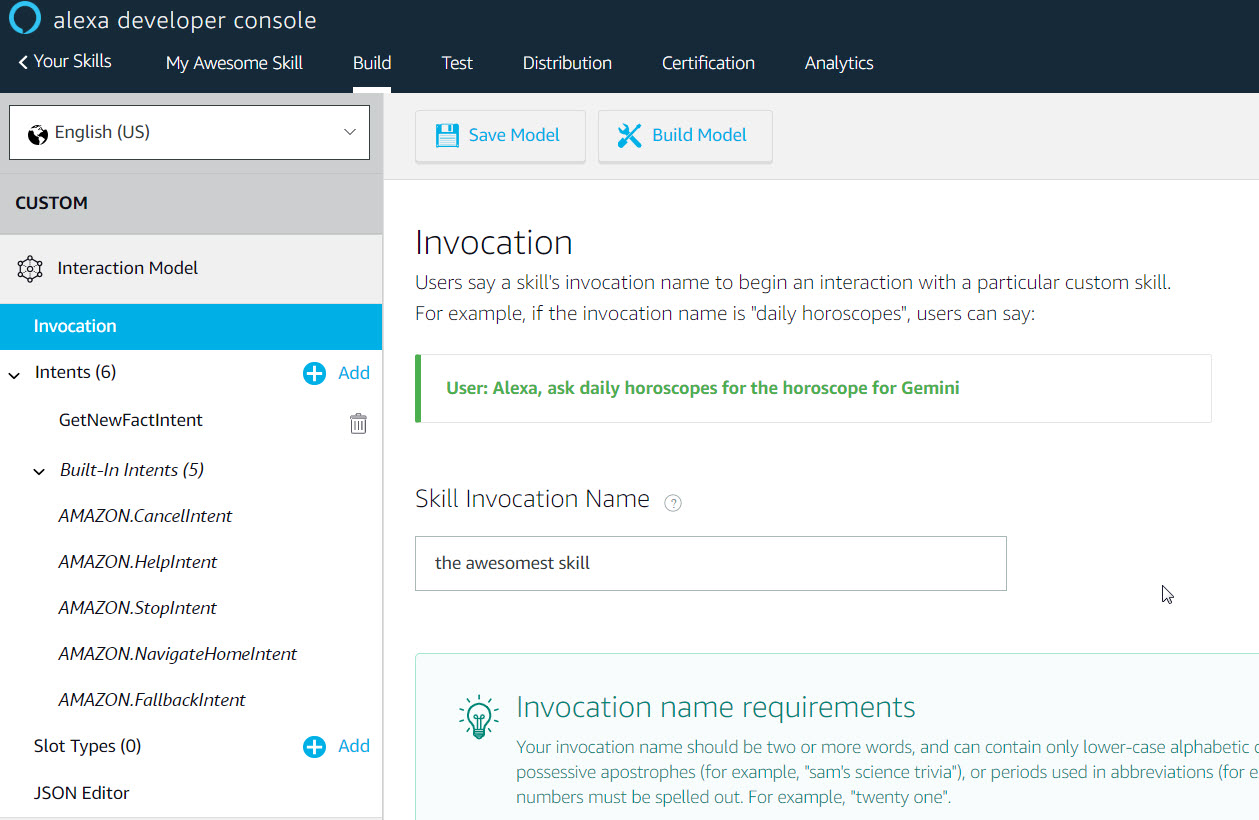
const SKILL_NAME = 'How Awesome';
const HELP_MESSAGE = 'To rate how awesome something is, you can say "Sandwiches" are a 2 of of 10.';
const PROMPT = "Tell me what's awesome?"
const HELP_REPROMPT = "I couldn't understand what you said. " + HELP_MESSAGE + " " + PROMPT;

const handlers = {
'LaunchRequest': function () {
// ------------------------------------------------
// THIS INTENT IS CALLED WHEN THE SKILL IS LAUNCHED
// ------------------------------------------------
this.speak(PROMPT).listen(HELP_REPROMPT);
this.emit(':responseReady');
},
'HowAwesome': function () {
// ------------------
// THIS IS OUR INTENT
// ------------------
this.response.speak("How Awesome");
this.emit(':responseReady');
console.log(this.event.request.intent.slots);
},
'AMAZON.HelpIntent': function () {
this.response.speak(HELP_MESSAGE).listen(HELP_REPROMPT);
this.emit(':responseReady');
},
'AMAZON.CancelIntent': function () {
this.emit(':responseReady');
},
'AMAZON.StopIntent': function () {
this.emit(':responseReady');
},
'SessionEndedRequest': function(){
// ------------------------------------------------------
// THIS INTENT MUST BE HANDLED SO THAT THE SKILL CAN EXIT
// ------------------------------------------------------
this.emit(':responseReady');
}
};

exports.handler = function (event, context, callback) {
const alexa = Alexa.handler(event, context, callback);
alexa.APP_ID = APP_ID;
alexa.registerHandlers(handlers);
alexa.execute();
};

The above code can be tested after we configure the code. To do so, choose Configure test events from the “Select a test event” drop down:

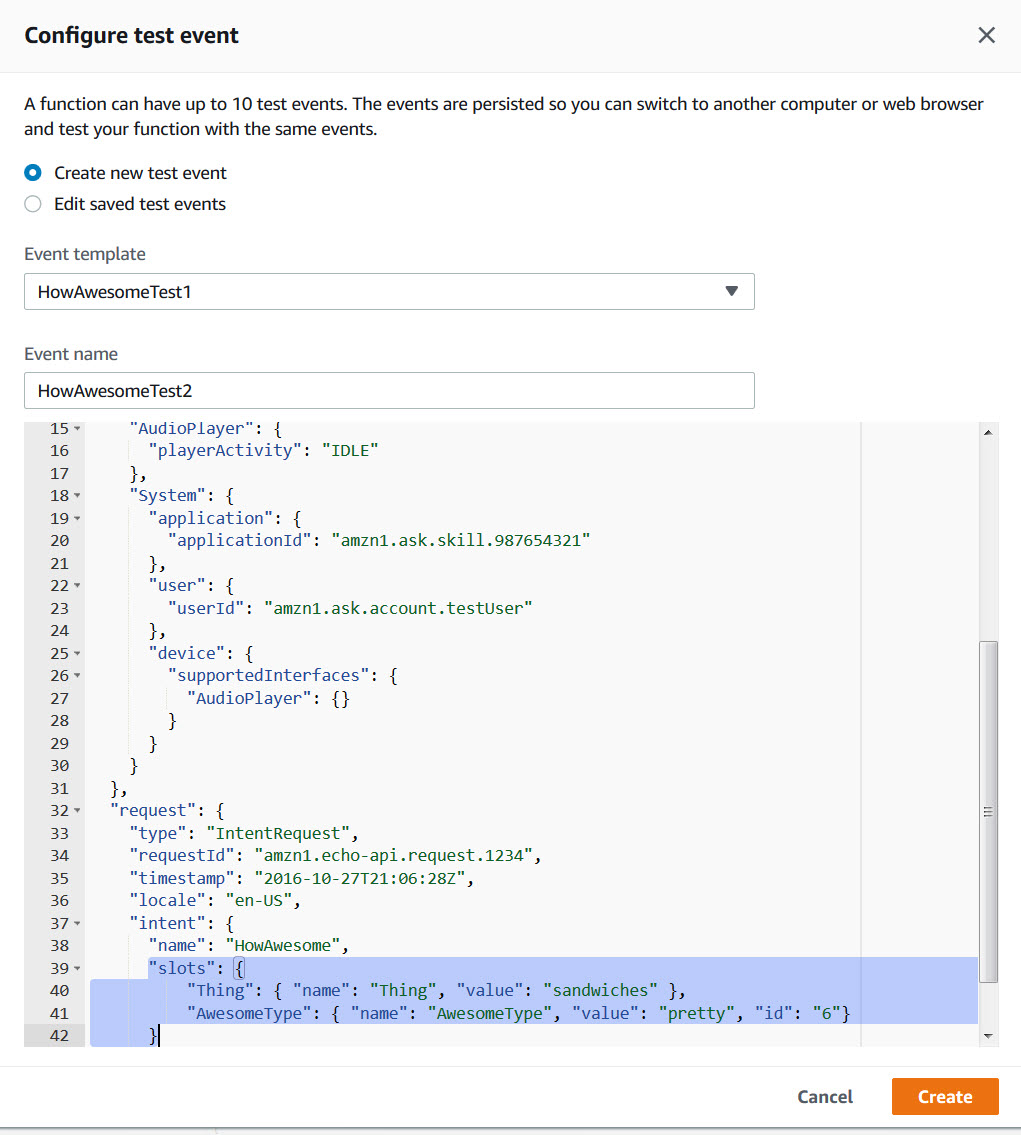
In the pop up window, we choose Create new test event, and select template Amazon Alexa Intent GetNewFact, then we’ll rename it, to HowAwesomeTest1:

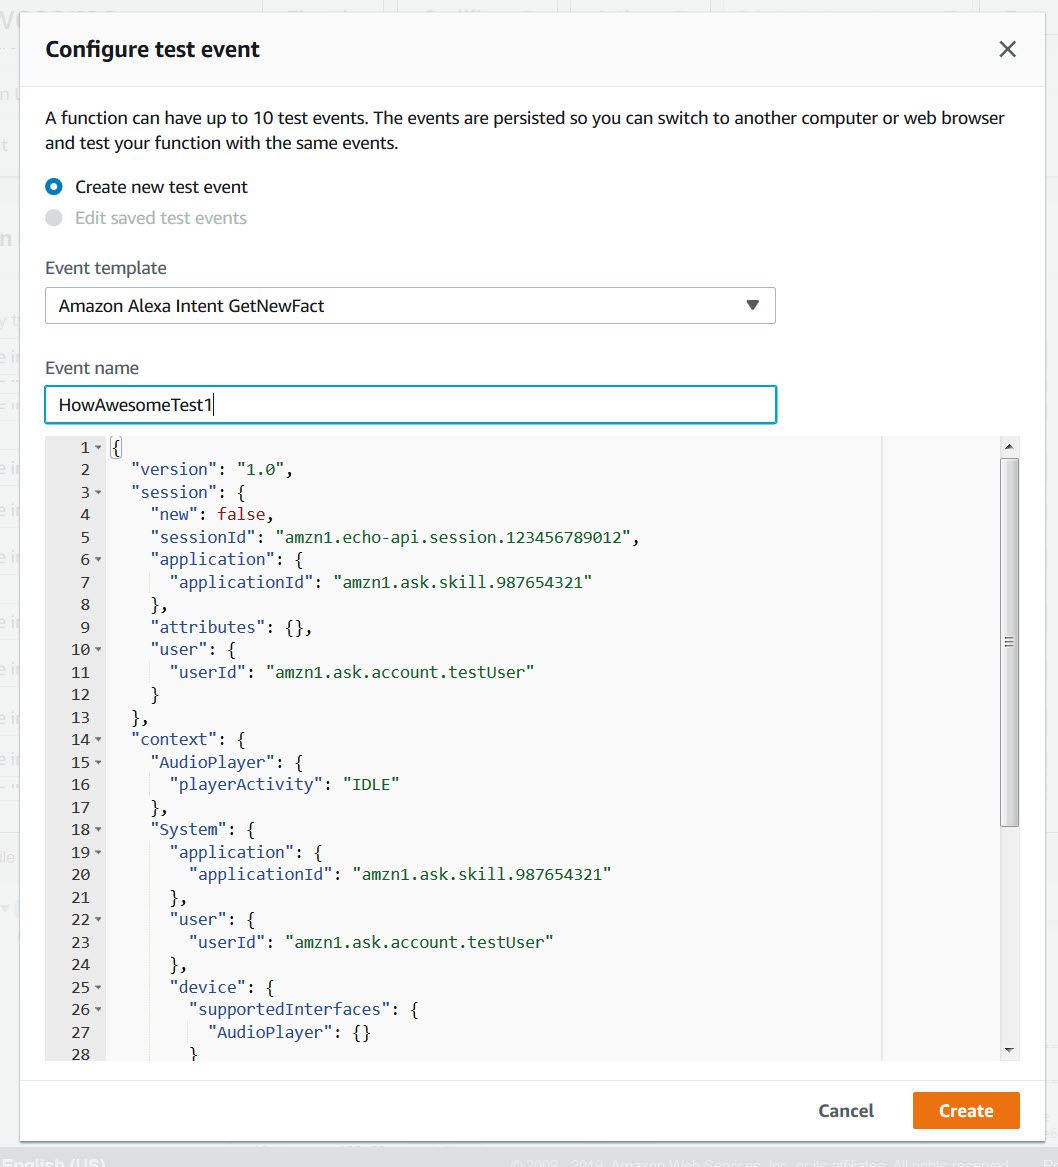
Before you hit create, modify the portion of the code where the request object is defined to be the following:

"request": {
"type": "IntentRequest",
"requestId": "amzn1.echo-api.request.1234",
"timestamp": "2016-10-27T21:06:28Z",
"locale": "en-US",
"intent": {
"name": "HowAwesome",
"slots": {
"Thing": { "name": "Thing", "value": "sandwiches" },
"OneOutOfTen": { "name": "OneOutOfTen", "value": 10}
}
}

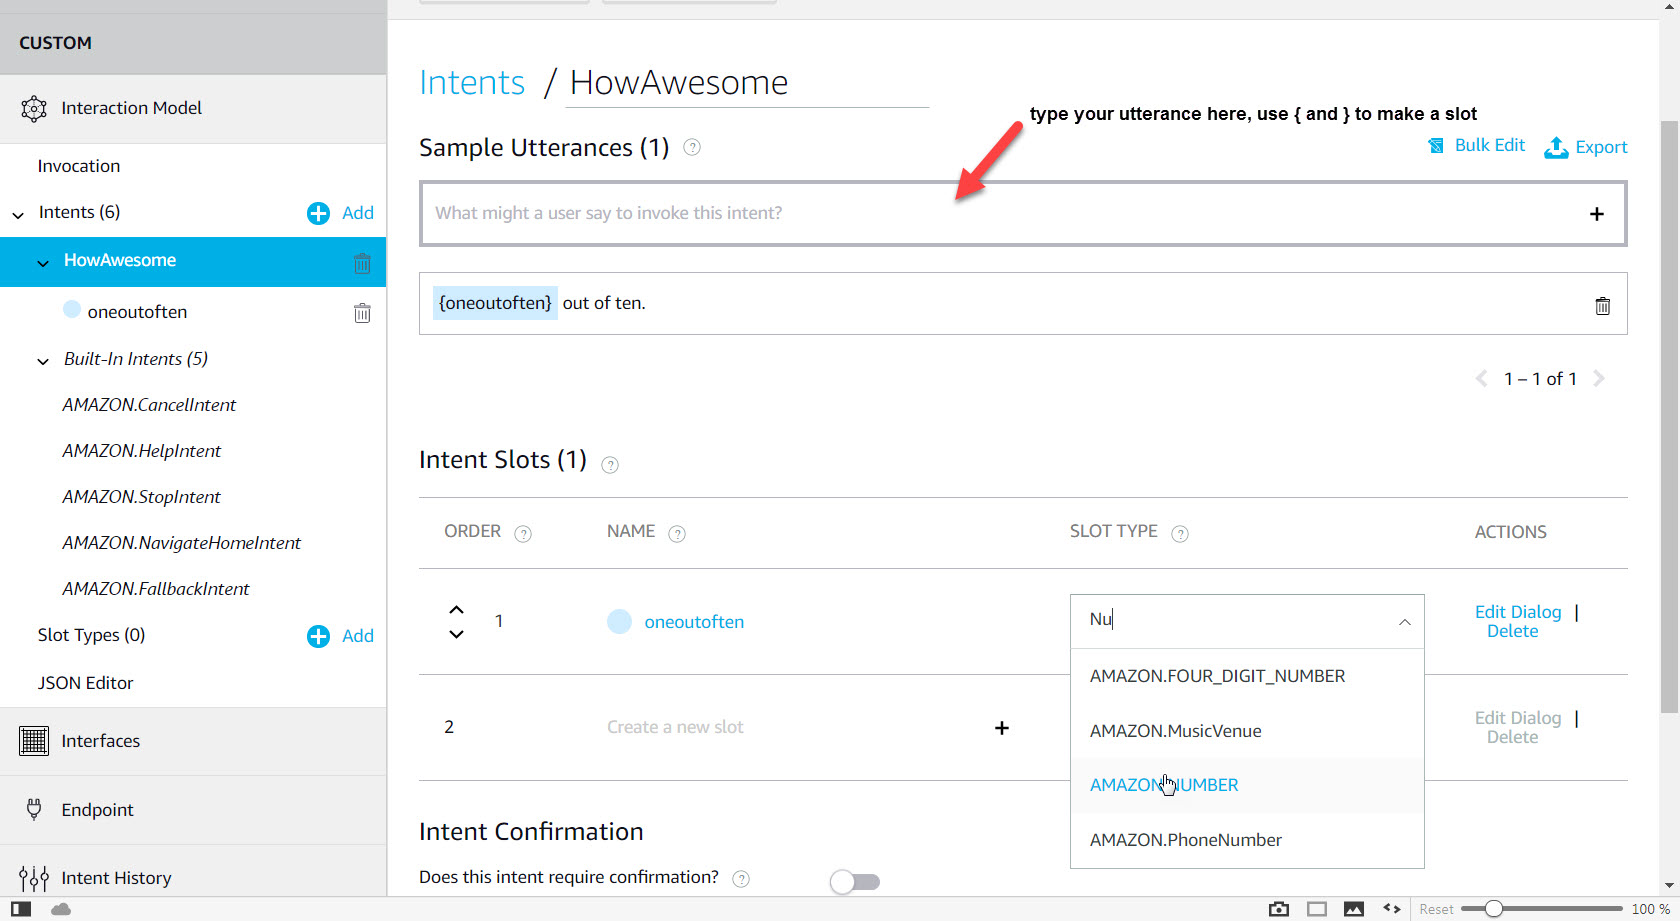
We have changed the name of the intent to our HowAwesome Intent, and provided data in the slots object.

The slot fields follow the convention shown above, the Name of the slot, followed by an object with a redundant name property and a value. The ID will also appear in here if applied in the Skill’s slot configuration.

Now click the Create button and you will see the drop down populates with our HowAwesomeTest1. We want to Save the function, and then test it.

When you run the test, you should see results like the following:

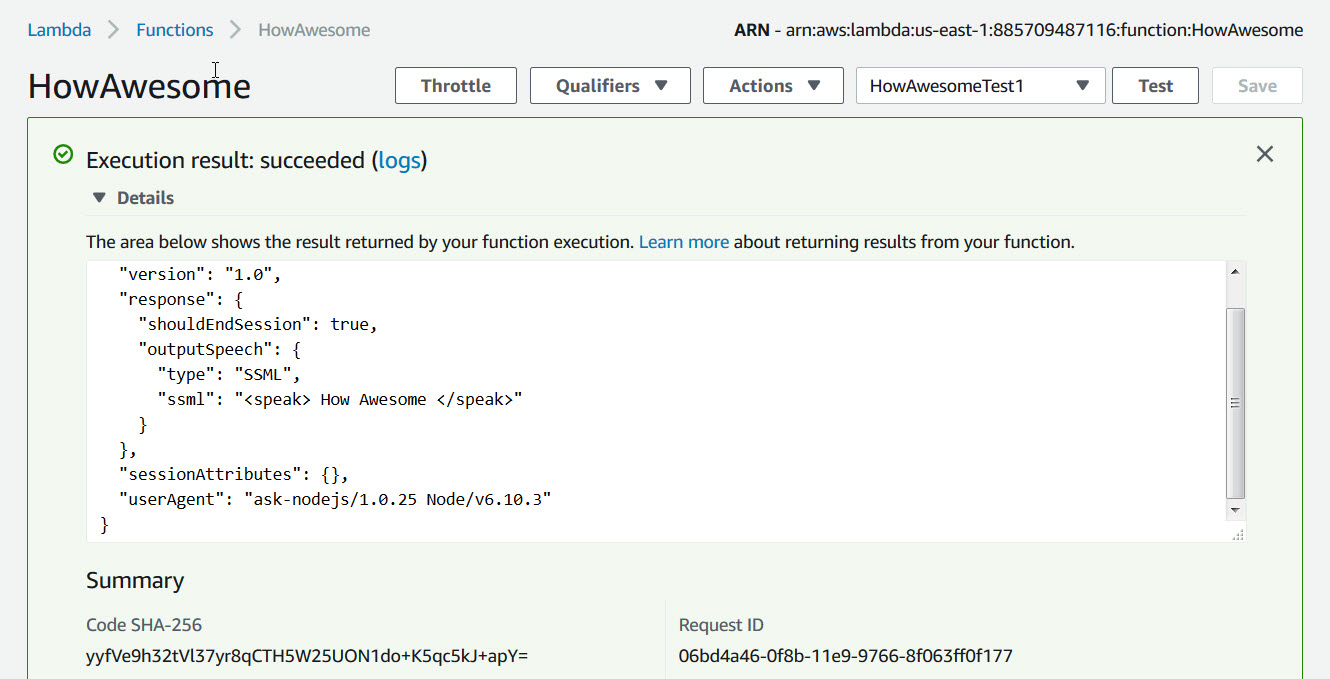
Results will show in green box if successful, or light red if failed. The Details will show the speech output JSON, and lower down, the log output from using console.log. So for the result JSON:

{
"version": "1.0",
"response": {
"shouldEndSession": true,
"outputSpeech": {
"type": "SSML",
"ssml": " How Awesome
"
}
},
"sessionAttributes": {},
"userAgent": "ask-nodejs/1.0.25 Node/v6.10.3"
}

And for the log output:

START RequestId: 06bd4a46-0f8b-11e9-9766-8f063ff0f177 Version: $LATEST
2019-01-03T19:09:00.465Z 06bd4a46-0f8b-11e9-9766-8f063ff0f177 Warning: Application ID is not set
2019-01-03T19:09:00.484Z 06bd4a46-0f8b-11e9-9766-8f063ff0f177 { Thing: { name: 'Thing', value: 'sandwiches' },
OneOutOfTen: { name: 'OneOutOfTen', value: 10 } }
END RequestId: 06bd4a46-0f8b-11e9-9766-8f063ff0f177
REPORT RequestId: 06bd4a46-0f8b-11e9-9766-8f063ff0f177 Duration: 109.37 ms Billed Duration: 200 ms Memory Size: 128 MB Max Memory Used: 32 MB

You can see that we have outputted to the logs the JSON of the slots field which comes into play when the platform calls the Lambda function from the Alexa Skill after matching an Utterance, but here we are explicitly providing it.

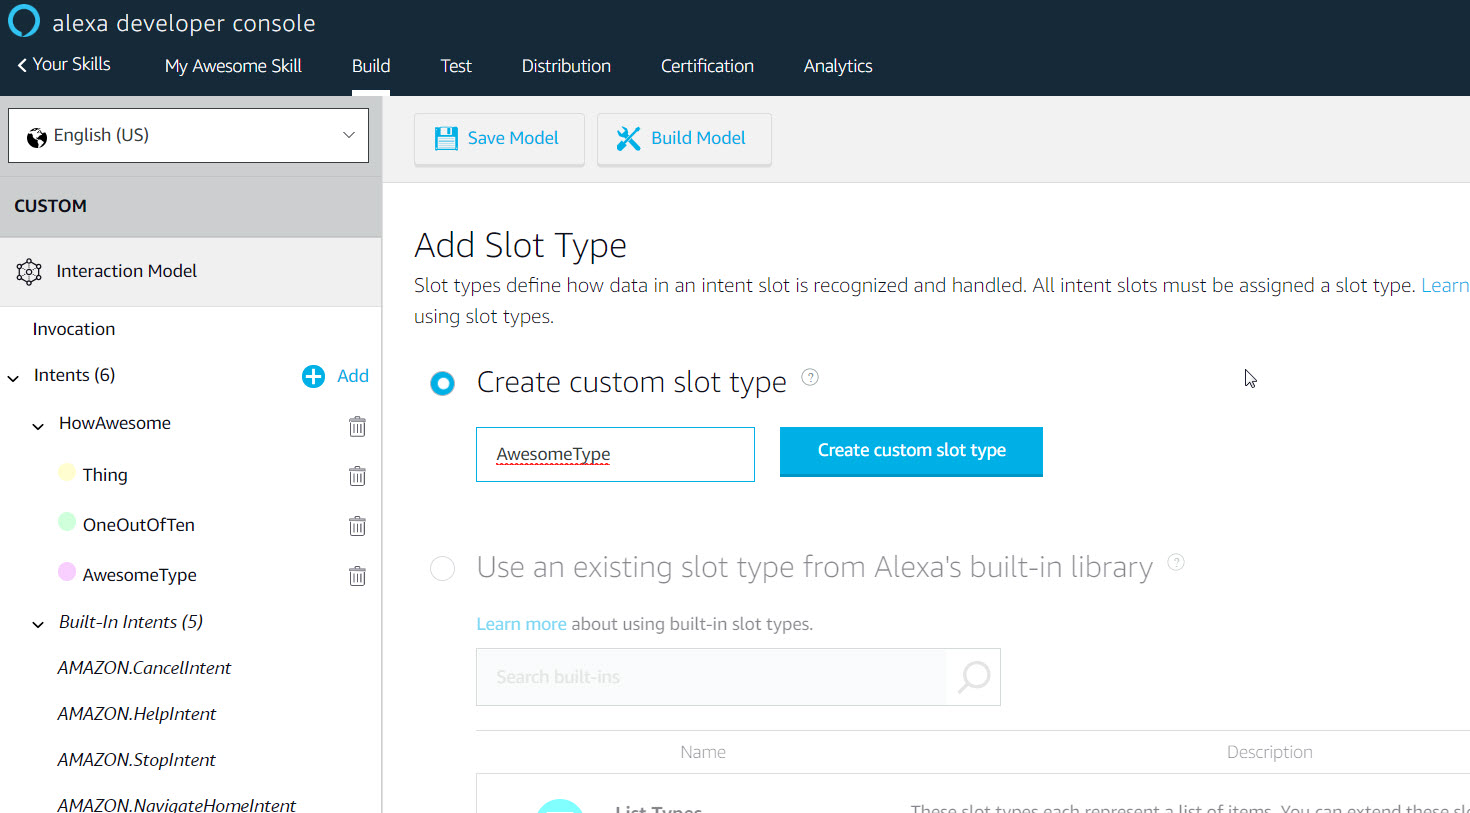
Lets change the HowAwesome Intent to something more…functional. Try this:

'HowAwesome': function () {
   // ------------------
// THIS IS OUR INTENT
// ------------------
if(this.event.request.intent.slots && this.event.request.intent.slots.Thing && this.event.request.intent.slots.Thing.value)
{
var thing = this.event.request.intent.slots.Thing.value;
  if(this.event.request.intent.slots.OneOutOfTen && this.event.request.intent.slots.OneOutOfTen.value)
{
var rating = this.event.request.intent.slots.OneOutOfTen.value;
if(this.rating < 1 || this.rating > 10)
this.response.speak("You can only rate something as a 1 out of 10 for numeric awesomeness.");
else
this.response.speak("You have rated " + thing + " as " + rating + " out of 10 for awesomeness.");
}
else if(this.event.request.intent.slots.AwesomeType && this.event.request.intent.slots.AwesomeType.value)
{
var atype = this.event.request.intent.slots.AwesomeType.value;
var aid = this.event.request.intent.slots.AwesomeType.id;
this.response.speak("You have rated " + thing + " as " + atype + " awesome, " + aid + " out of 10.");
}
}
else
{
this.response.speak(HELP_MESSAGE).listen(HELP_REPROMPT);
}
this.emit(':responseReady');
},

This code will receive a value from either of our slots; OneOutOfTen, and AwesomeType. The response from Alexa will differ depending on which slot is populated, which is a matter of which Utterance is matched.

Let’s create a new test for our new Intent code. Choose the Configure test events option from the drop down again, and using the first test we created as a template, change the following part (the slot values):

Create the new test, save the Lamda Function, and run the new test. You should see the following JSON output:

{
"version": "1.0",
"response": {
"shouldEndSession": true,
"outputSpeech": {
"type": "SSML",
"ssml": " You have rated sandwiches as pretty awesome, 6 out of 10.
"
}
},
"sessionAttributes": {},
"userAgent": "ask-nodejs/1.0.25 Node/v6.10.3"
}

So you can see that it’s going to the second logic branch for the AwesomeType and preparing speech that contains both the type of awesomeness and the number it maps to.

Next we’ll test our Lambda Function using the Alexa Skill itself in the Alexa Developer Console. (coming soon…)

Buy Me A Coffee
If this guide was helpful, please consider a little tip

Developing and distributing an Alexa Skill (Part 1)

Despite my protests, my wife went ahead and bought an Alexa Echo for the house. I didn’t like giving Amazon access to so much personal data, and still don’t, but now, having used the device for a month or so, it has become helpful.

After you get over the unsavory way in which Alexa tries to sell you amazon stuff, and the frustration of a stuttered or hesitant sentence not being recognized, the utility of having a live mic that can process inquiries in real time is undoubtedly useful, and it’s also fun (my son likes asking it what a blue whale sounds like).

Alexa is at its best when used simply. Single queries, not conversations, quips, not chapters, reading, not writing.

Amazon has made the development pretty easy, but unfortunately, it is fragmented across multiple offerings which was the main issue I had approaching the platform.

The utility I wanted early on was the ability to ask for verses from the New American Bible, and not the King James version which is missing several books. You can take a look at the outcome here.

And what follows is the path I took to develop my Alexa Skill that can do lookup a verse in the New American Bible (Revised Edition)…

Creating a new skill

First, go to https://developer.amazon.com and create an account.

Once logged-in, visit the Developer Console. There you will see the Alexa option in the navbar, and choose Alexa Skills Kit.

amazon-dev-console_navbar-alexa

Under the Alexa Skills listing, click the Create Skill button:

amazon-dev-console_alexa-skills_create-skill.jpg

In the next menu you can choose a sample app to start with. I would definitely recommend choosing the Fact Skill as it has the minimal point of entry. As far as I can tell, the biggest difference between them besides the source code that it creates with, is the Intent settings that are also created.

alexa-skills_choose-template

This will land you on the Skill’s dashboard page:

alexa-skills_skill-dashboard

On the left side navigation, you will see the elements that compose your skill, from a meta-data standpoint. All of these boil down the JSON that appears in the JSON Editor, which comes in handy when you need to edit some of the Utterances, or if you want to quickly copy a Skill’s settings into another skill.

Also in the sidebar (not shown in screen above), is the Endpoint configuration link. This is the URL where Amazon’s servers will look for your app’s code to handle the launch request.

Where does the skill app code go?

The skill has to point to a URL which is hosted either by AWS or on your own server. That URL needs to handle specific requests.

I used the AWS Lambda function option, which the Amazon developer site encourages, for a variety of reasons; most notably is that the free-tier offers a lot of usage for no cost. However, you can point it to a different URL where your server is hosted, or an ngrok.io endpoint to do local development. I explored this, but ended up going with the Lambda option, because it removed some of the unknowns, and I wanted to get up and running with least amount of effort.

System and custom Intents

When you develop a skill, you will need to handle a few system level Intents. These are like system events that occur depending on how your app is used. They can get pretty advanced, such as doing media playback, but that’s out of scope for us here.

The Fact Skill creates most of the Intents you need to handle, and includes one custom Intent to drive the core function of the app: to speak a random fact.

In addition to your own custom Intents, the Intents you will need to handle in your app are

  • AMAZON.CancelIntent
  • AMAZON.HelpIntent
  • AMAZON.StopIntent
  • LaunchRequest
  • SessionEndedRequest

Notice that the last two listed do not appear in the sidebar of the out-of-the-box Intents for the Fact Skill template. But they will need to be handled within the app.

Invocation of the skill

The invocation is how Alexa will launch your app. This is not so straightforward.

Alexa will launch your app given certain launch phrases such as “open”, “ask”, “start”, “launch”, etc, and the Invocation Name is the phrase that will map to your Skill. So if your skill is named “My Awesome Skill”, your invocation name could be simply “my awesome skill”, or you can make it different from the Skill name, such as “the awesomest skill,” whereby the full invocation would be

Alexa, open the awesomest skill.
alexa-skills_invocation-setting.jpg

Skill Utterances and Slots

When you want to try your skill, you need to launch it first. In the case of the out-of-the-box Fact Skill, the app doesn’t have need for an interaction, it simply blurts out one of a bunch of space facts.

When you develop, you should prompt the user for input when they launch the app. This input will then be matched against the Utterances you’ve added to the Skill. This will then be fed into the Intent that the matched Utterance maps to, and will be available as an event “slot” parameter.

If you click on the GetNewFactIntent, you are taken to a page where you can both rename the Intent (or you can just delete it create a new one), and then populate the Utterances for it.

alexa-skills_utterances_rename

In our case, we are going to create a couple ways to state how awesome something is.

As you type in the new Sample Utterance field, you can use the curly brackets to create a slot, which is the variable that will be populated by the user when he interacts with your skill. The utterance that gets matched and populated depends on the formation of the spoken sentence.

Let’s create a one to ten utterance with the following slot

{OneOutOfTen} out of ten
alexa-skills_utterances.jpg

I set the slot type to AMAZON.NUMBER so that it will be populated with an integer value.

I’m gonna make two ways of assessing awesomeness of a thing, the first is a number from 1 to 10 using the AMAZON.NUMBER slot type, the second is a custom slot type which I will call AwesomeType, and it will allow me to make a list of phrases which map to 1 to 10 numbers. Finally, I will create a slot for the thing which is being assessed using the AMAZON.SearchQuery which will use Alexa’s voice recognition to resolve a string phrase.

First, to create the custom slot type, click the add button next to the Slot Types menu item in the left sidebar.

Fill in a name for the type (no spaces):

alexa-skills_slot-type-create

Next you can add values in one of two ways:

  1. by entering them one at a time, or
  2. by using the bulk import, which receives a CSV file.

I prefer the second option, whereby the developer can load in a tab delimited file (without headers). The first column is the value which Alexa will use speech recognition to match, the second is the ID which is what will be sent to your app’s function (the Name is also sent in), and any following column is a synonym which Alexa will use alternately to map to the same ID (or value if no ID is provided). So the CSV would look like this:

Value1  ID1     Synonym1        Synonym2        (etc)

With the field populated, my slot type looks like this:

alexa-skills_slot-type_values

So Alexa will look for one of these values to populate the AwesomeType of one of my Utterances, which are as follows:

alexa-skills_utterances-list.jpg

So

  • {Thing} will use Amazon speech recognition to deliver a string phrase
  • {OneOutOfTen} will resolve to an integer value
  • {AwesomeType} will resolve to one of my field options which will include an ID that I can parse into an integer

So I have one Custom Intent and 5 built-in ones, one of which is optional; AMAZON.FallbackIntent, which can be used in the event that Alexa cannot understand what you said. It’s probably a good idea to handle this with at least a “Sorry, I couldn’t understand that kind of awesomeness” message.

Make sure to save the model using the Save Model button at the top of the page.

Creating an AWS Lambda function

Save the model, and then hop to https://aws.amazon.com and sign up for an account. Once you’ve done that, you can create a Lambda function which will be used to host your app.

Under the AWS Console, click on the services menu on the top navbar and select Lambda from the drop down menu:

aws-services_menu.jpg

On the listing for functions, click Create Function. Then on the Create Function page, select Blueprints, and then enter “alexa” in the search filter and choose alexa-skill-kit-sdk-factskill from the results, and click Configure:

aws-services_lambda_create-function

On the next screen you will enter the Basic Information of the Lambda; the name of the Lambda function (no spaces), and also choose a Role (which has the permissions for which the function to be called). I just click through which looks like this:

aws-services_lambda_role-access

Allow the IAM Role, and then you will return to the Basic Information screen:

aws-services_lambda_create-function_basic-information

Syncing the Lamba function with the Alexa Skill

After this, you will be taken to the Lambda editing page, where you will see printed at the top, the ARN code of the Lambda function. You will need to copy this and enter it into the Endpoint screen of your Alexa Skill later:

aws-services_lambda_add-trigger

On this edit page, you will need to add a Alexa Skills Kit trigger from the Add Triggers menu. You will see that when you do this, you will be prompted to configure the trigger using the Skill ID of your Alexa Skill:

aws-services_lambda_configure-trigger

So you need to have open both the Alexa Developer Console and the AWS Lambda Editor open to do this next part.

  1. In the Alexa Developer Console, click the Endpoint option in the leftside navigation, and copy the Skill ID you see listed and
  2. Paste it in the AWS Lambda Editor‘s trigger configuration field, and click Add there. Then Save it using the Save button near the ARN code at the top of the page.
  3. In the AWS Lambda Editor, copy the ARN code that appears at the top of the page, and
  4. Paste it in the Alexa Developer Console‘s Endpoint configuration form’s Default Region field, then save it using the Save Endpoint button that appears at the top of the page. You should see a green Skill Manifest Saved Successfully toast message appear.

Note on Default Region: I’ve been using East 1 (N. Virginia). I don’t know if choosing another region has any impact but I have read some users complaining about region issues, possibly between resources, not sure, but I stuck to East 1.

Back to the AWS Lambda Editor, you now need to code your app…!

I will tackle this in Part 2.