This guide continues from Part 1 where we review how to set up the app.
Now we’re ready to code the Lambda function that will actually perform the Skill’s dialogue with a user.
The Lamda Function code editor is pretty decent. With it, you can add and edit files easily, and they will store to the server side.
I like to use Vivaldi browser, but with it, I was seeing this error message a lot:
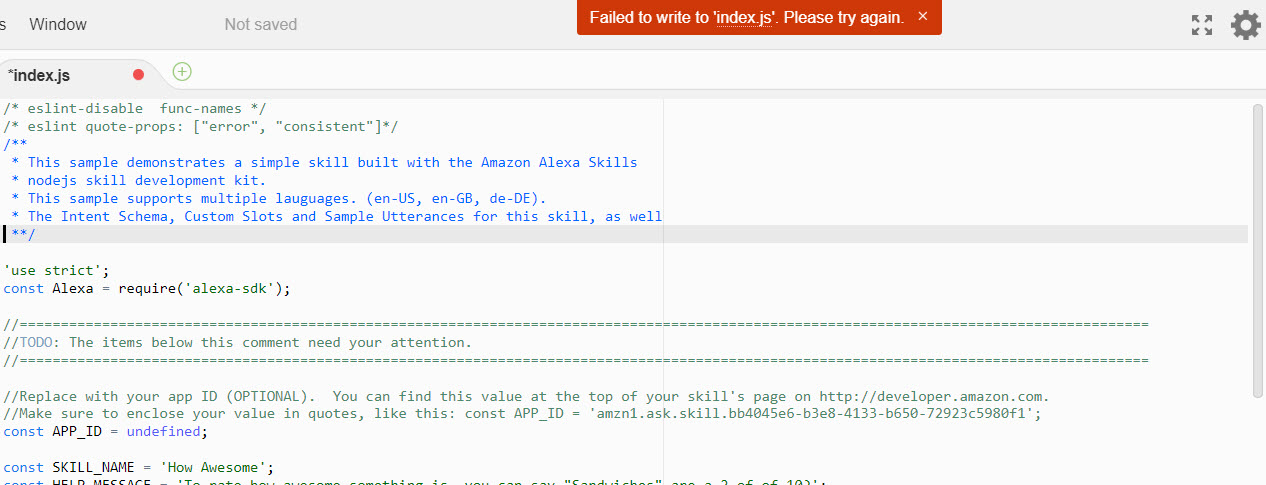
When I switched to Firefox, I was not seeing this. I have also seen others report this issue online. One thing I can tell you is that I currently have very little space on my hard drive, and I think that could be a factor, because when I first started developing using Vivaldi, it was not an issue.
Anyways, to access your code, you need to click on the the Lambda Function name in the designer view:
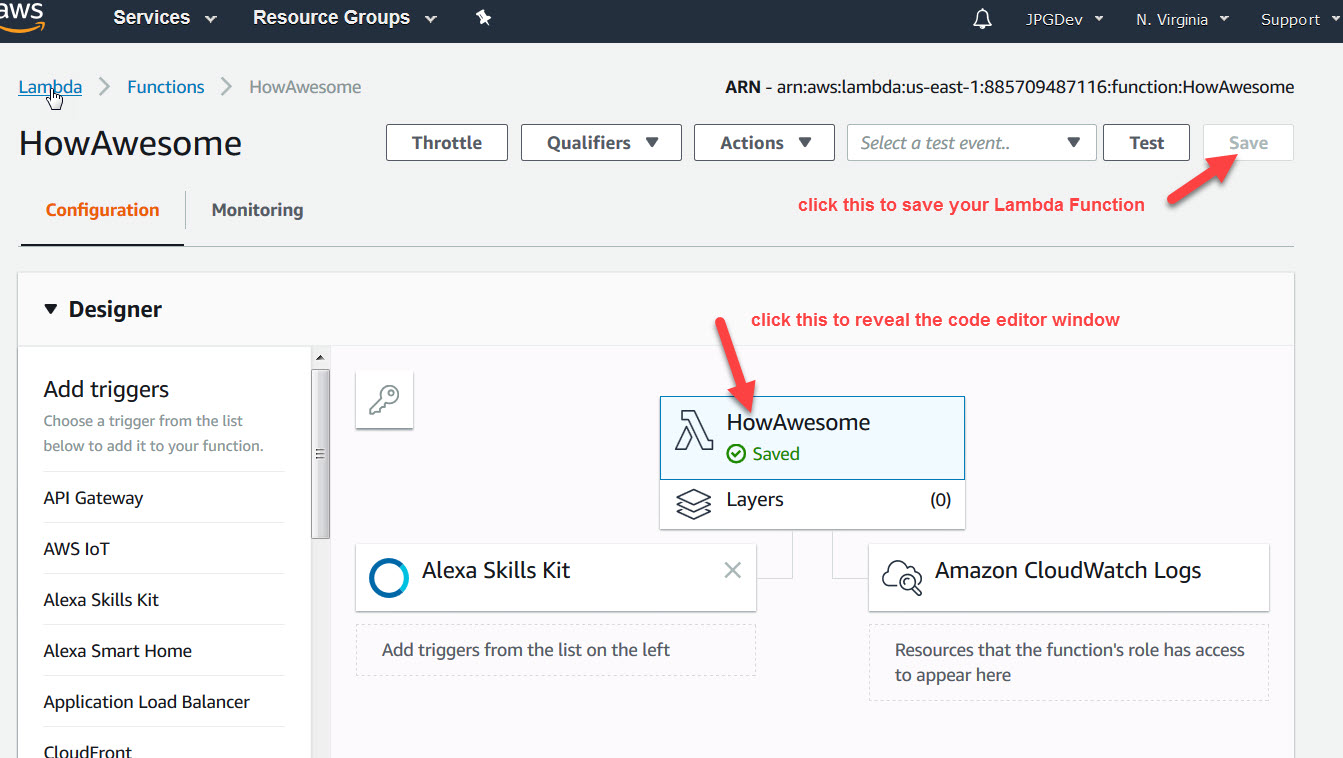
Then scroll down and see the code:
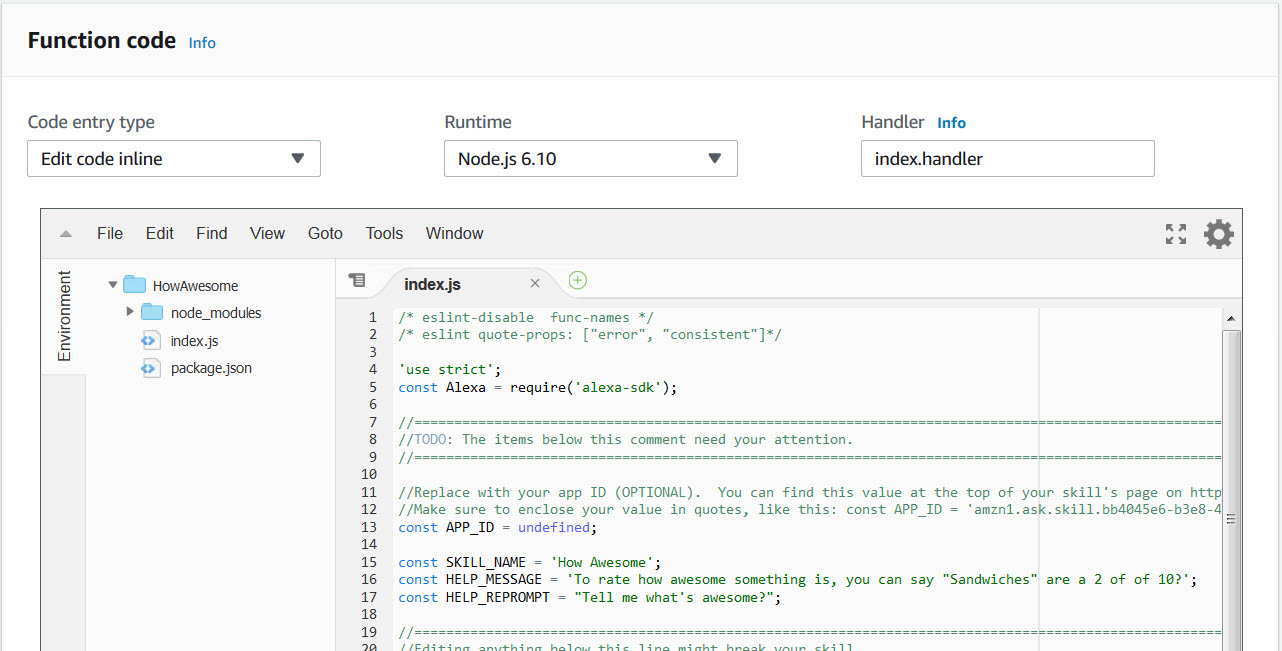
Let’s make some changes to the code above, and then we’ll test it. I have edited it to look like the following:
/* eslint-disable  func-names / / eslint quote-props: ["error", "consistent"]*/
 'use strict';
 const Alexa = require('alexa-sdk');
 //=========================================================================================================================================
 //TODO: The items below this comment need your attention.
 //=========================================================================================================================================
 //Replace with your app ID (OPTIONAL).  You can find this value at the top of your skill's page on http://developer.amazon.com.
 const APP_ID = undefined;
 const SKILL_NAME = 'How Awesome';
 const HELP_MESSAGE = 'To rate how awesome something is, you can say "Sandwiches" are a 2 of of 10.';
 const PROMPT = "Tell me what's awesome?"
 const HELP_REPROMPT = "I couldn't understand what you said. " + HELP_MESSAGE + " " + PROMPT;

 const handlers = {
     'LaunchRequest': function () {
         // ------------------------------------------------
         // THIS INTENT IS CALLED WHEN THE SKILL IS LAUNCHED
         // ------------------------------------------------
         this.speak(PROMPT).listen(HELP_REPROMPT);
         this.emit(':responseReady');
     },
     'HowAwesome': function () {
         // ------------------
         // THIS IS OUR INTENT
         // ------------------
         this.response.speak("How Awesome");
         this.emit(':responseReady');
         console.log(this.event.request.intent.slots);
      },
     'AMAZON.HelpIntent': function () {
         this.response.speak(HELP_MESSAGE).listen(HELP_REPROMPT);
         this.emit(':responseReady');
     },
     'AMAZON.CancelIntent': function () {
         this.emit(':responseReady');
     },
     'AMAZON.StopIntent': function () {
         this.emit(':responseReady');
     },
     'SessionEndedRequest': function(){
         // ------------------------------------------------------
         // THIS INTENT MUST BE HANDLED SO THAT THE SKILL CAN EXIT
         // ------------------------------------------------------
         this.emit(':responseReady');
     }
 };

 exports.handler = function (event, context, callback) {
     const alexa = Alexa.handler(event, context, callback);
     alexa.APP_ID = APP_ID;
     alexa.registerHandlers(handlers);
     alexa.execute();
 };
The above code can be tested after we configure the code. To do so, choose Configure test events from the “Select a test event” drop down:

In the pop up window, we choose Create new test event, and select template Amazon Alexa Intent GetNewFact, then we’ll rename it, to HowAwesomeTest1:
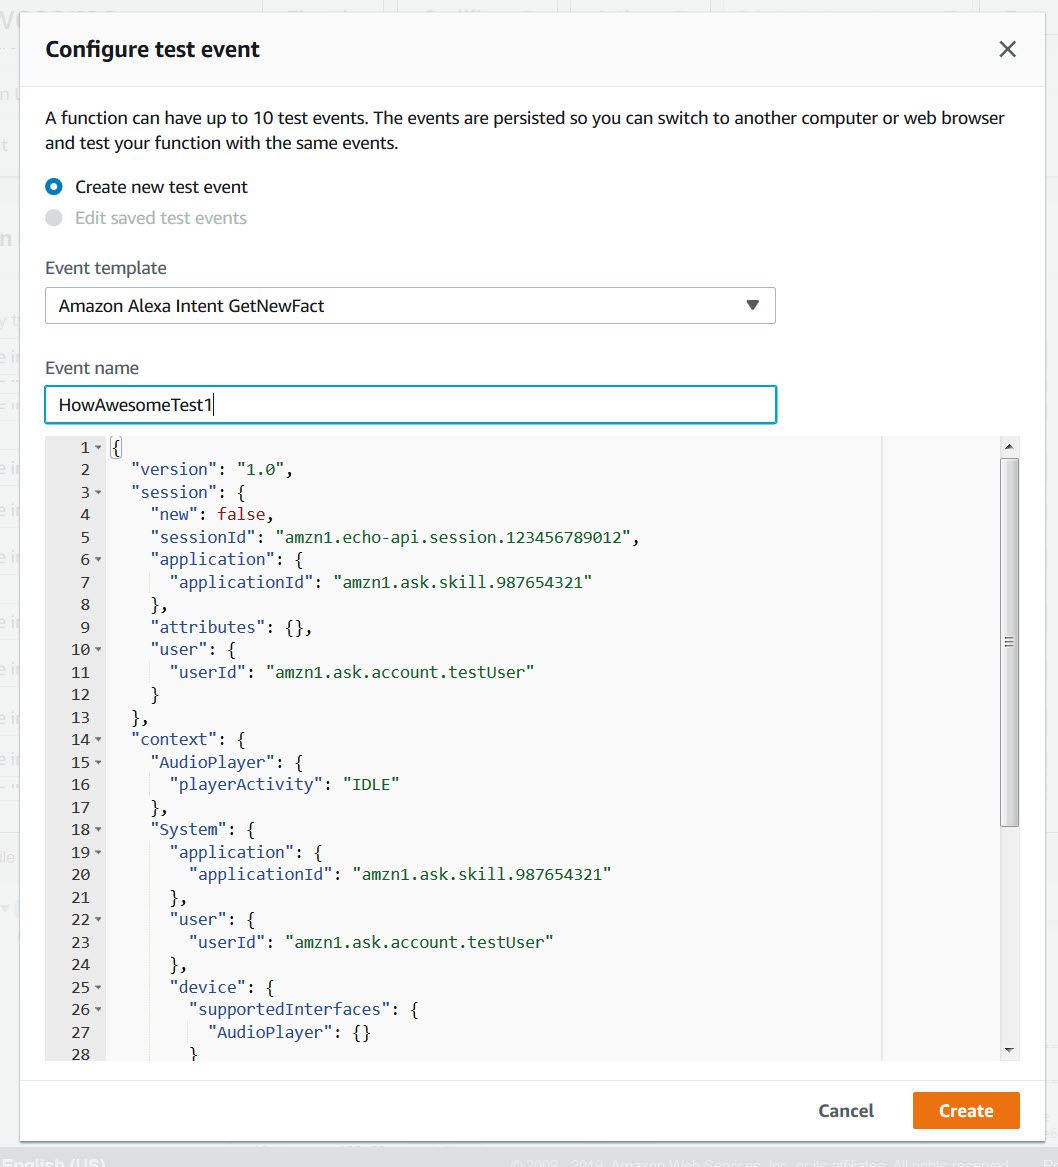
Before you hit create, modify the portion of the code where the request object is defined to be the following:
"request": {
     "type": "IntentRequest",
     "requestId": "amzn1.echo-api.request.1234",
     "timestamp": "2016-10-27T21:06:28Z",
     "locale": "en-US",
     "intent": {
       "name": "HowAwesome",
       "slots": {
           "Thing": { "name": "Thing", "value": "sandwiches" },
           "OneOutOfTen": { "name": "OneOutOfTen", "value": 10}
       }
     }
We have changed the name of the intent to our HowAwesome Intent, and provided data in the slots object.
The slot fields follow the convention shown above, the Name of the slot, followed by an object with a redundant name property and a value. The ID will also appear in here if applied in the Skill’s slot configuration.
Now click the Create button and you will see the drop down populates with our HowAwesomeTest1. We want to Save the function, and then test it.
When you run the test, you should see results like the following:
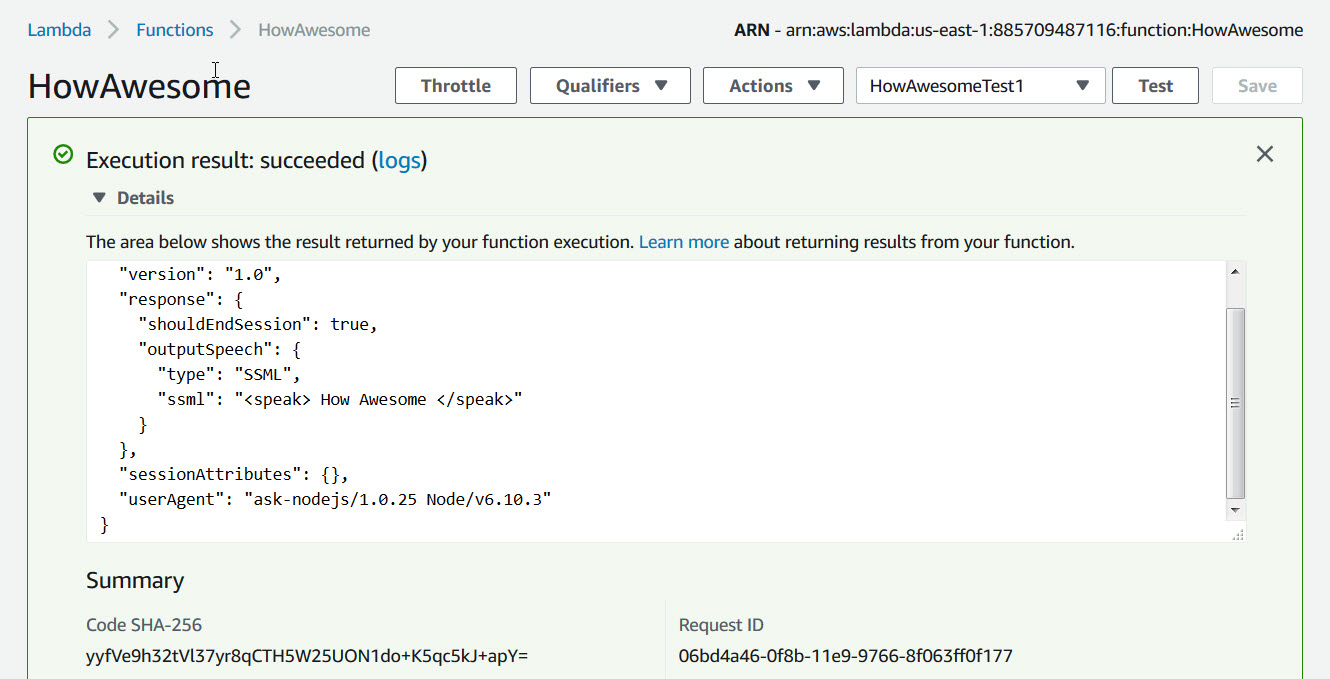
Results will show in green box if successful, or light red if failed. The Details will show the speech output JSON, and lower down, the log output from using console.log. So for the result JSON:
{
   "version": "1.0",
   "response": {
     "shouldEndSession": true,
     "outputSpeech": {
       "type": "SSML",
       "ssml": " How Awesome
"
     }
   },
   "sessionAttributes": {},
   "userAgent": "ask-nodejs/1.0.25 Node/v6.10.3"
 }
And for the log output:
START RequestId: 06bd4a46-0f8b-11e9-9766-8f063ff0f177 Version: $LATEST
 2019-01-03T19:09:00.465Z    06bd4a46-0f8b-11e9-9766-8f063ff0f177    Warning: Application ID is not set
 2019-01-03T19:09:00.484Z    06bd4a46-0f8b-11e9-9766-8f063ff0f177    { Thing: { name: 'Thing', value: 'sandwiches' },
   OneOutOfTen: { name: 'OneOutOfTen', value: 10 } }
 END RequestId: 06bd4a46-0f8b-11e9-9766-8f063ff0f177
 REPORT RequestId: 06bd4a46-0f8b-11e9-9766-8f063ff0f177    Duration: 109.37 ms Billed Duration: 200 ms     Memory Size: 128 MB Max Memory Used: 32 MB
You can see that we have outputted to the logs the JSON of the slots field which comes into play when the platform calls the Lambda function from the Alexa Skill after matching an Utterance, but here we are explicitly providing it.
Lets change the HowAwesome Intent to something more…functional. Try this:
'HowAwesome': function () {// ------------------// THIS IS OUR INTENT// ------------------if(this.event.request.intent.slots && this.event.request.intent.slots.Thing && this.event.request.intent.slots.Thing.value){var thing = this.event.request.intent.slots.Thing.value;if(this.event.request.intent.slots.OneOutOfTen && this.event.request.intent.slots.OneOutOfTen.value){var rating = this.event.request.intent.slots.OneOutOfTen.value;if(this.rating < 1 || this.rating > 10)this.response.speak("You can only rate something as a 1 out of 10 for numeric awesomeness.");elsethis.response.speak("You have rated " + thing + " as " + rating + " out of 10 for awesomeness.");}else if(this.event.request.intent.slots.AwesomeType && this.event.request.intent.slots.AwesomeType.value){var atype = this.event.request.intent.slots.AwesomeType.value;var aid = this.event.request.intent.slots.AwesomeType.id;this.response.speak("You have rated " + thing + " as " + atype + " awesome, " + aid + " out of 10.");}}else{this.response.speak(HELP_MESSAGE).listen(HELP_REPROMPT);}this.emit(':responseReady');},
This code will receive a value from either of our slots; OneOutOfTen, and AwesomeType. The response from Alexa will differ depending on which slot is populated, which is a matter of which Utterance is matched.
Let’s create a new test for our new Intent code. Choose the Configure test events option from the drop down again, and using the first test we created as a template, change the following part (the slot values):
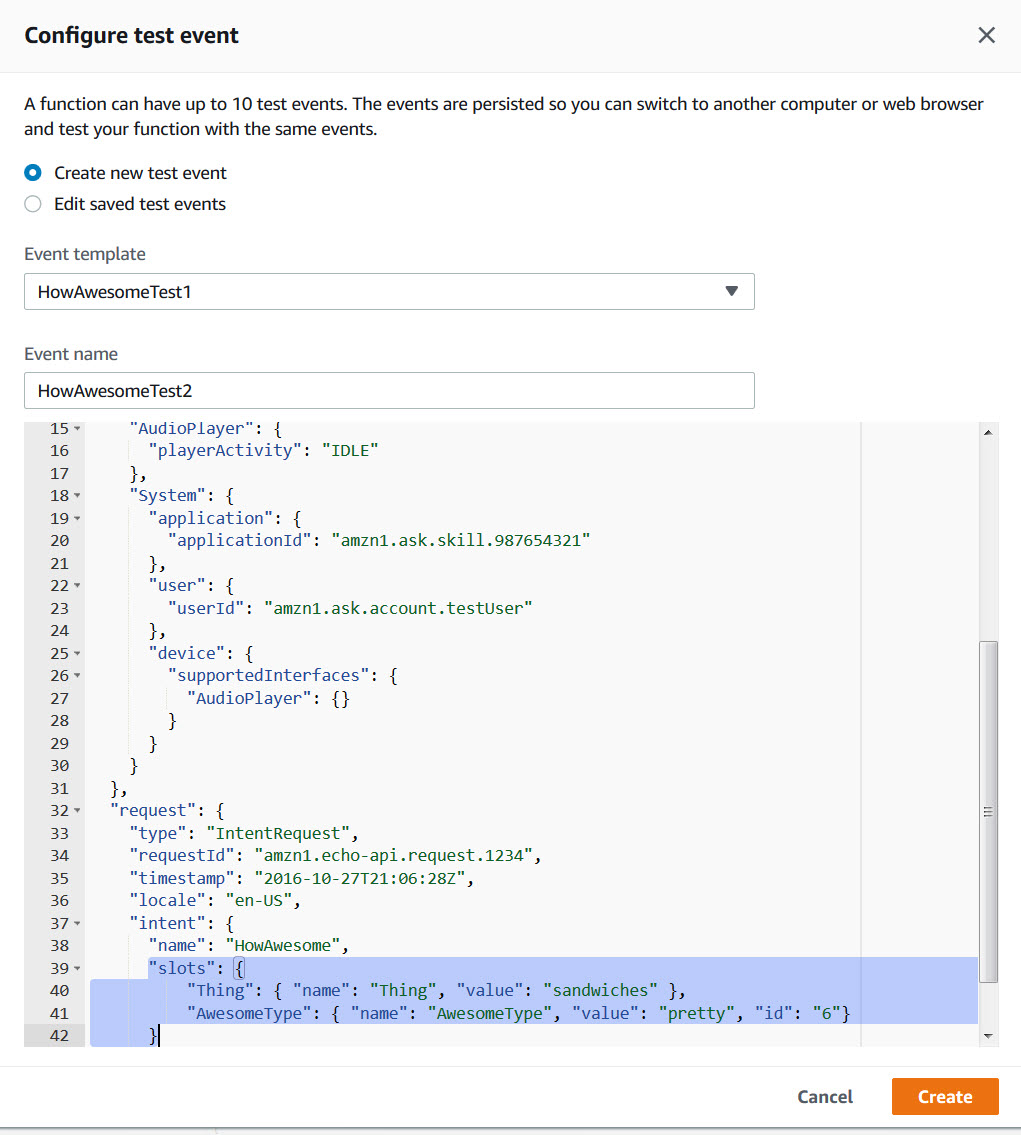
Create the new test, save the Lamda Function, and run the new test. You should see the following JSON output:
{
   "version": "1.0",
   "response": {
     "shouldEndSession": true,
     "outputSpeech": {
       "type": "SSML",
       "ssml": " You have rated sandwiches as pretty awesome, 6 out of 10.
"
     }
   },
   "sessionAttributes": {},
   "userAgent": "ask-nodejs/1.0.25 Node/v6.10.3"
 }
So you can see that it’s going to the second logic branch for the AwesomeType and preparing speech that contains both the type of awesomeness and the number it maps to.
Next we’ll test our Lambda Function using the Alexa Skill itself in the Alexa Developer Console. (coming soon…)
